Digital downloads are a great way for creators to make recurring income. Create one resource and sell it multiple times — no shipping fees or inventory tracking required!
While a digital products marketplace may put some restrictions on your file types (and will definitely take a cut of the sale), you can easily sell downloads yourself. By selling digital products with Notion and MemberSpace, you can earn money from PDFs, audio files, videos, icons, eBooks and more.
Start Selling Digital Products with Notion and MemberSpace
MemberSpace makes it simple to sell digital products using any compatible CMS, but we particularly like Notion for this purpose.
To get started, you’ll need:
- A free Notion account
- A domain name from a site like Google Domains, GoDaddy, or Namecheap
- A free MemberSpace plan
- A paid Super account
- A free Stripe account
If this is your first time using MemberSpace, be sure to set up your account and connect Stripe before launching your new digital products shop.
Step One: Set Up Your Notion Pages
You’ll need to create two pages in your Notion account:
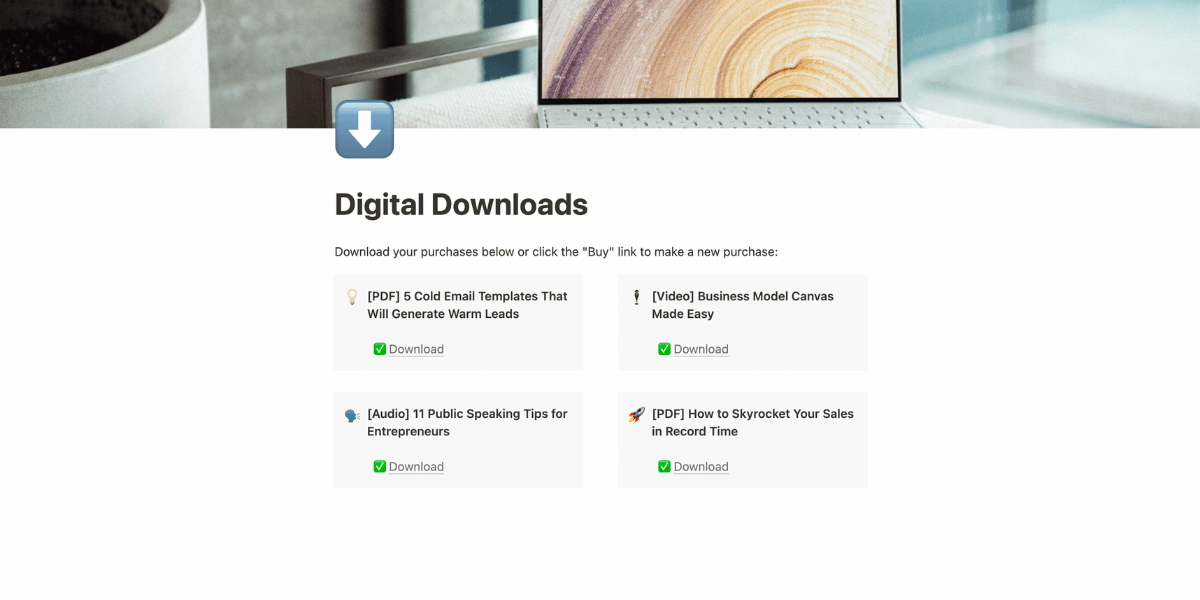
1. A landing page to advertise your digital products. This is where customers can make a purchase.
2. A “secret” download page that will only be visible to paying customers. This is where they’ll download purchased products.
Nest your “secret” page under the public landing page. This structure creates a subdirectory. Your Notion sidebar should look something like this:

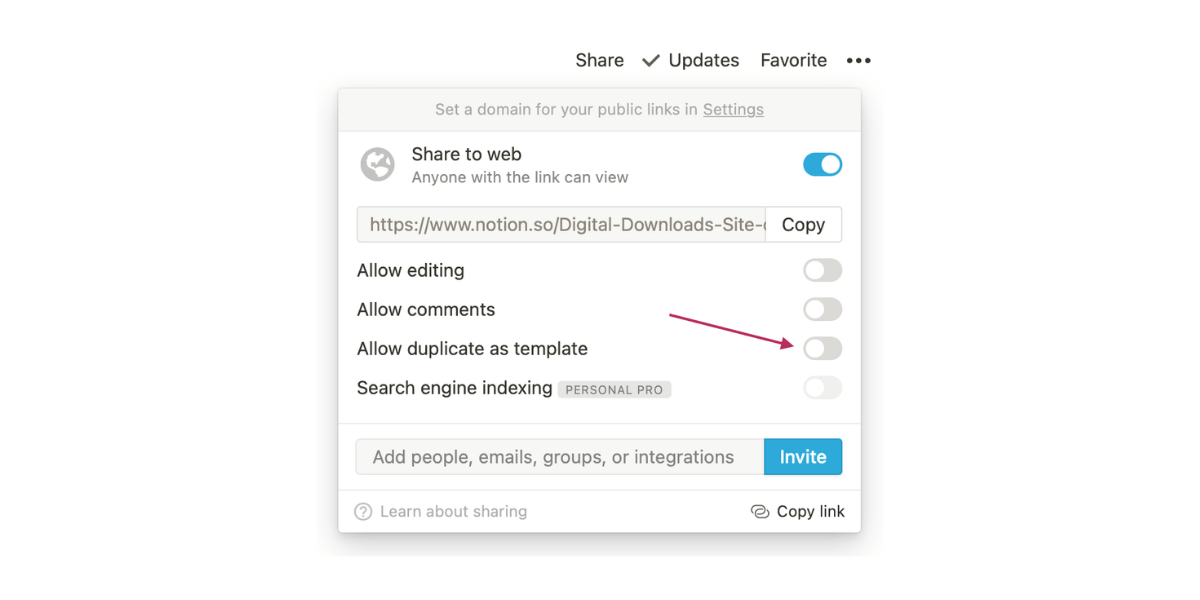
Make your top landing page public in Notion’s settings by clicking “share” in the upper right-hand corner of your screen. Next, toggle on the “share to web” option.
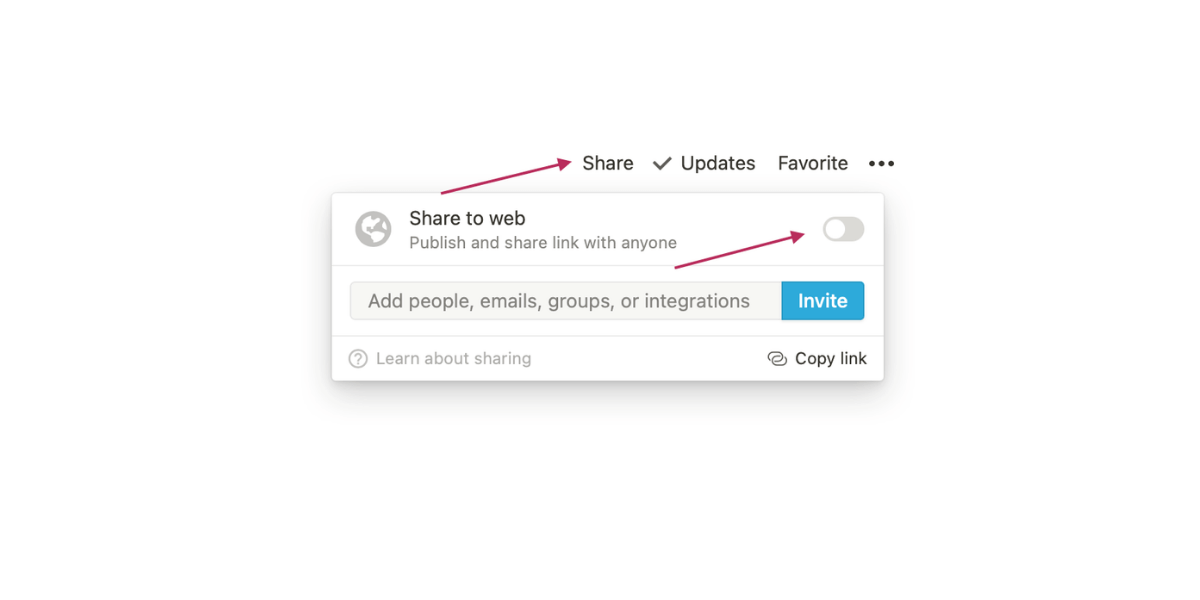
In the menu that opens up, toggle the “allow duplicate as template” to off.
This will make all of your subpages public, too, but not for long. We’ll be protecting those subpages with MemberSpace and Super.
Step Two: Set Up Your Notion Site In Super
Super is a convenient service that lets you turn any Notion workspace into a fully functional website.
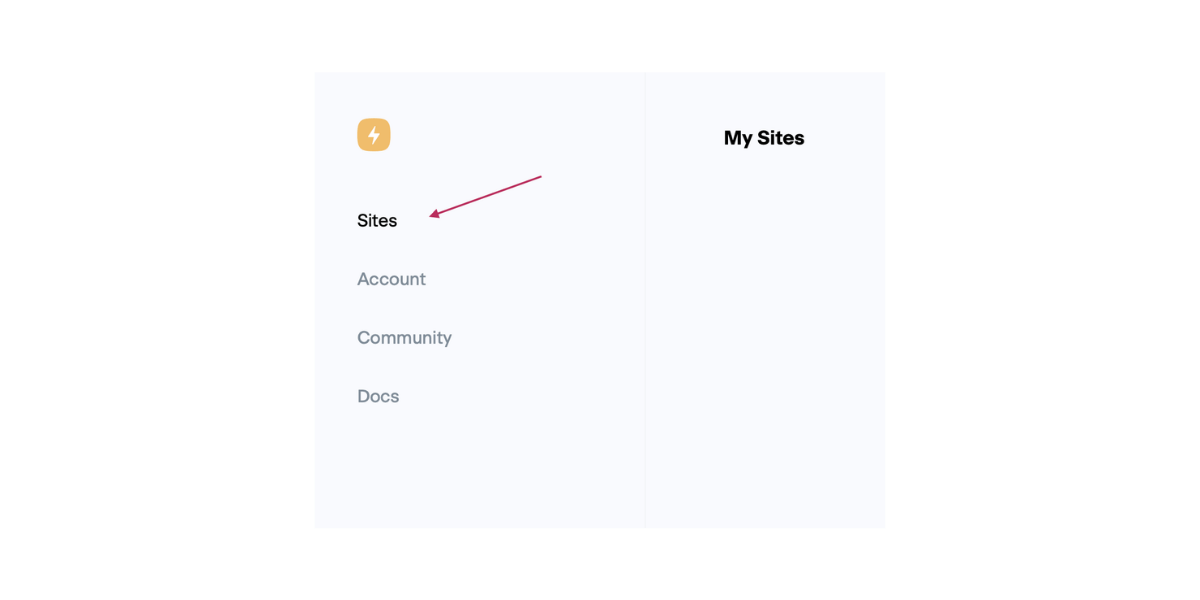
Log into Super and click “Sites” in the left-hand menu.
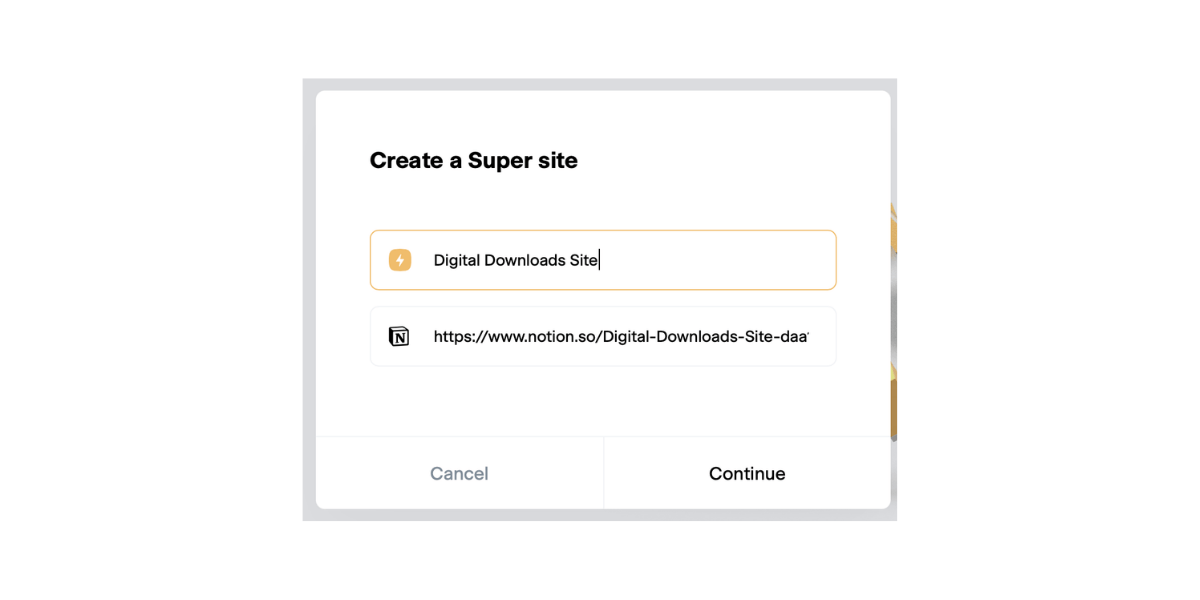
Next, click “New Site” in the upper right-hand corner.

Go back to your Notion workspace and copy the public URL we created in step one (it’s in the share menu!) Then, paste it into Super and give your site a name.
You’ll notice that Notion links are, by default, long and full of numbers. Don’t worry — Super turns all your Notion URLs into nice, pretty links using your custom domain.
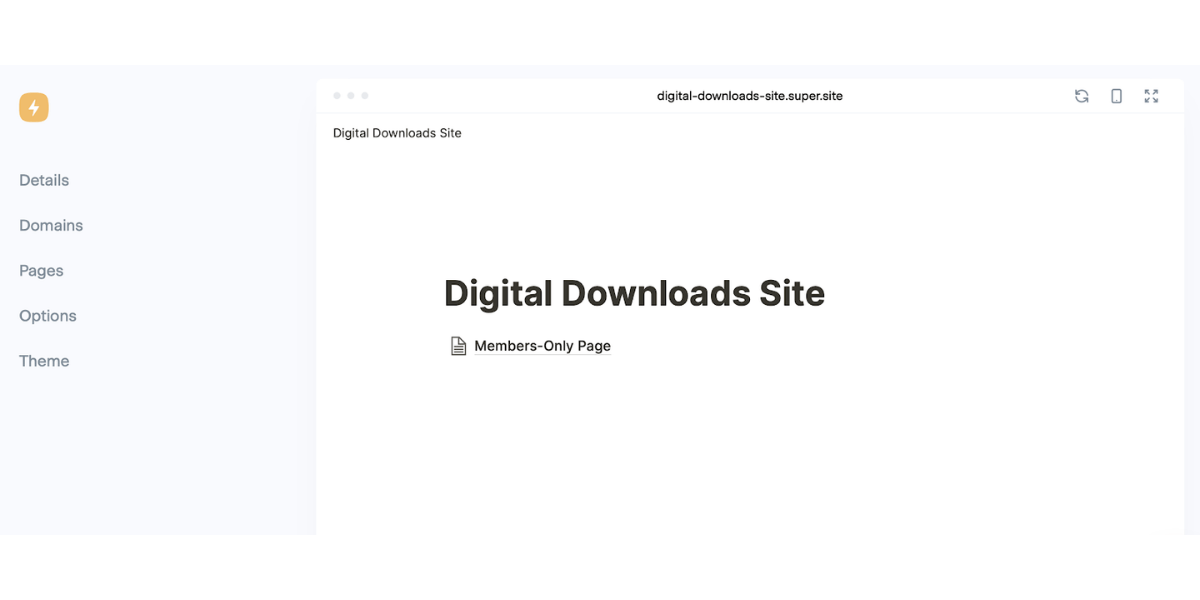
Click continue to advance to the next step. You’ll now see a preview of your site in Super, with a menu along the left.
Click “Domains.”
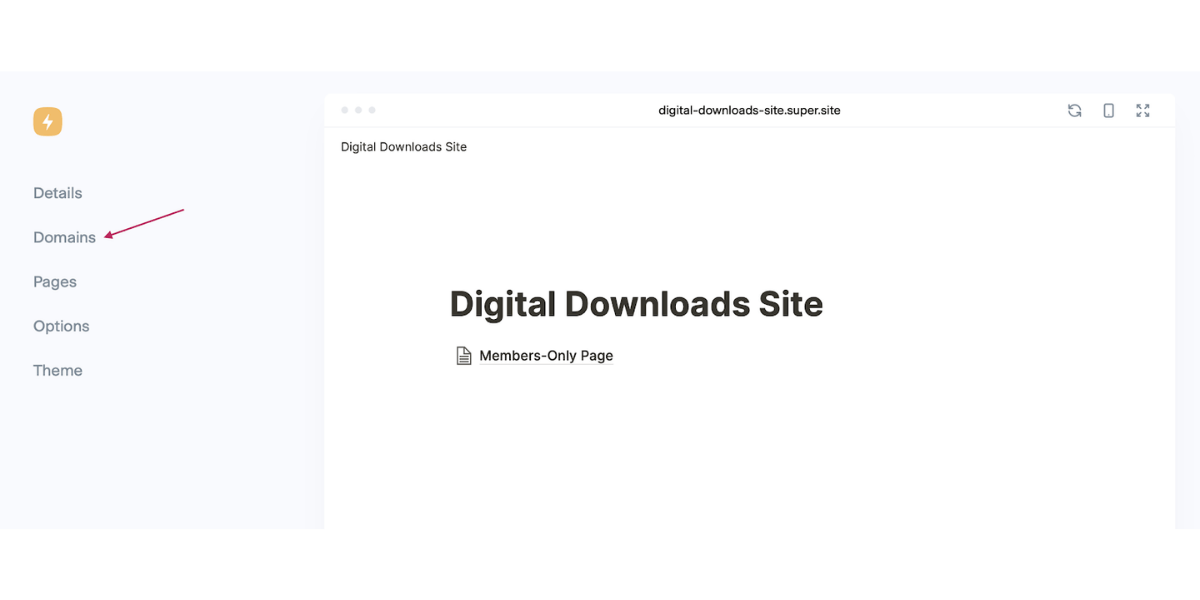
Click “Add a Custom Domain.”
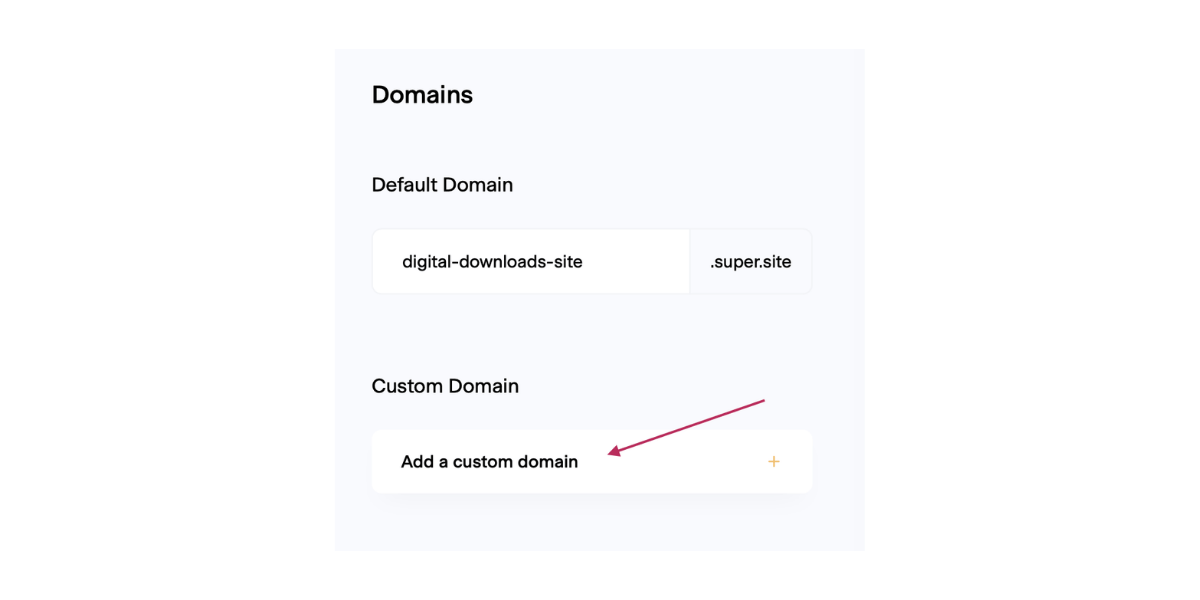
Follow Super’s steps to finish connecting your domain to their service. You will need to add another CNAME record and an A record to your domain that points to your Notion site — your registrar can help with this as well if needed.
Once your domain is connected, Super will take the names of your Notion pages and turn them into pretty URLs that are easy to link to. They’ll look something like this:
https://notion.yourwebsite.com/digital-downloads
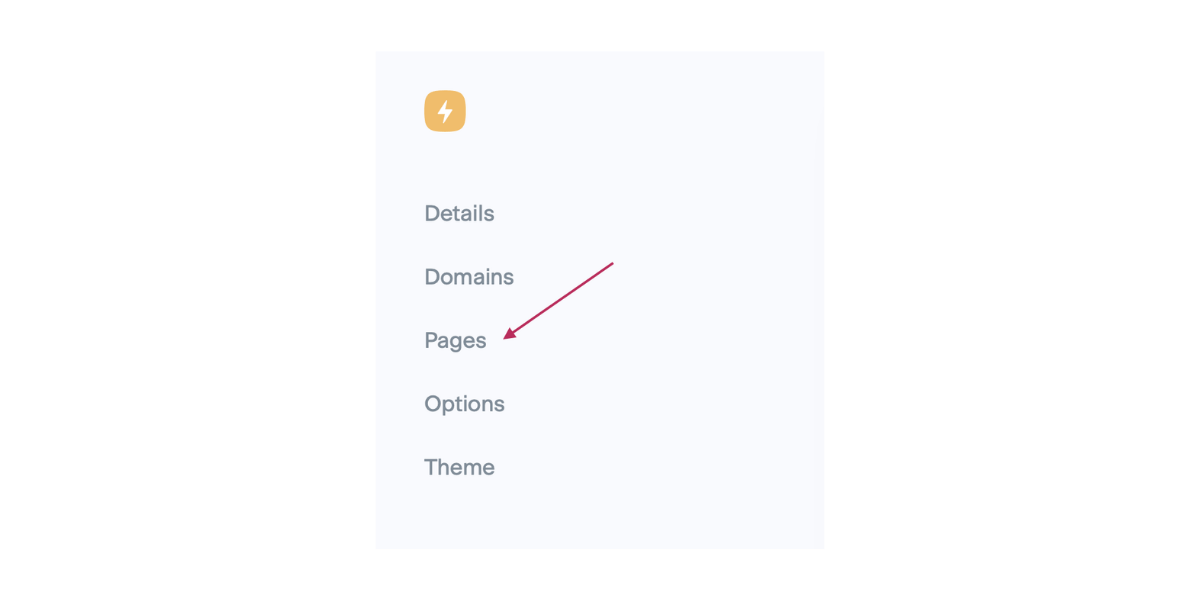
Click “pages” in your Super sidebar to check your new URLs out.
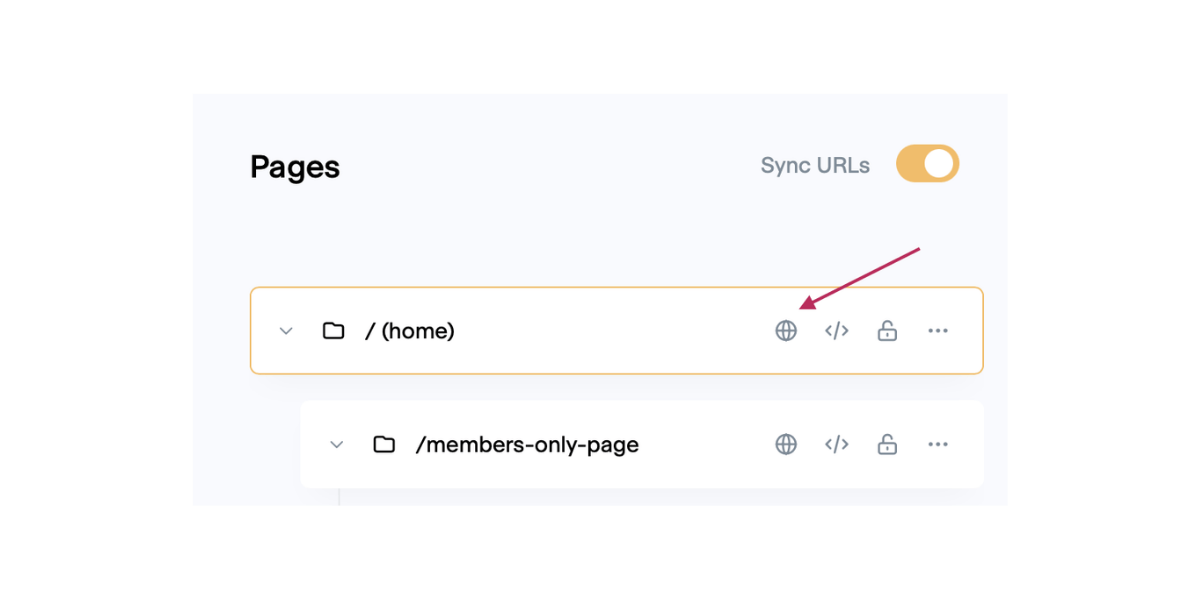
Click the globe icon next to any page name to open up your SEO settings.
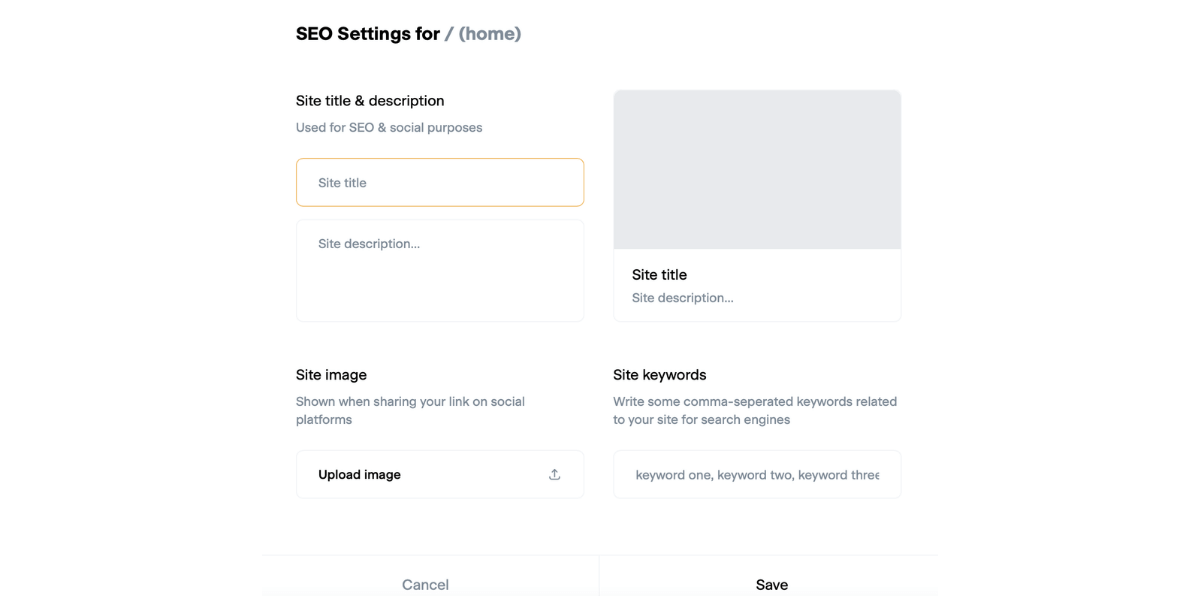
In the box that pops up, you can enter information into several fields.
- Site title and description: this is what will show up in search engine results.
- Site image: this image serves as a preview for shared links.
- Keywords: additional phrases and words associated with your website — think of things people might be likely to search for online that relate to your downloads.
Step Three: Install MemberSpace on Your Notion Site
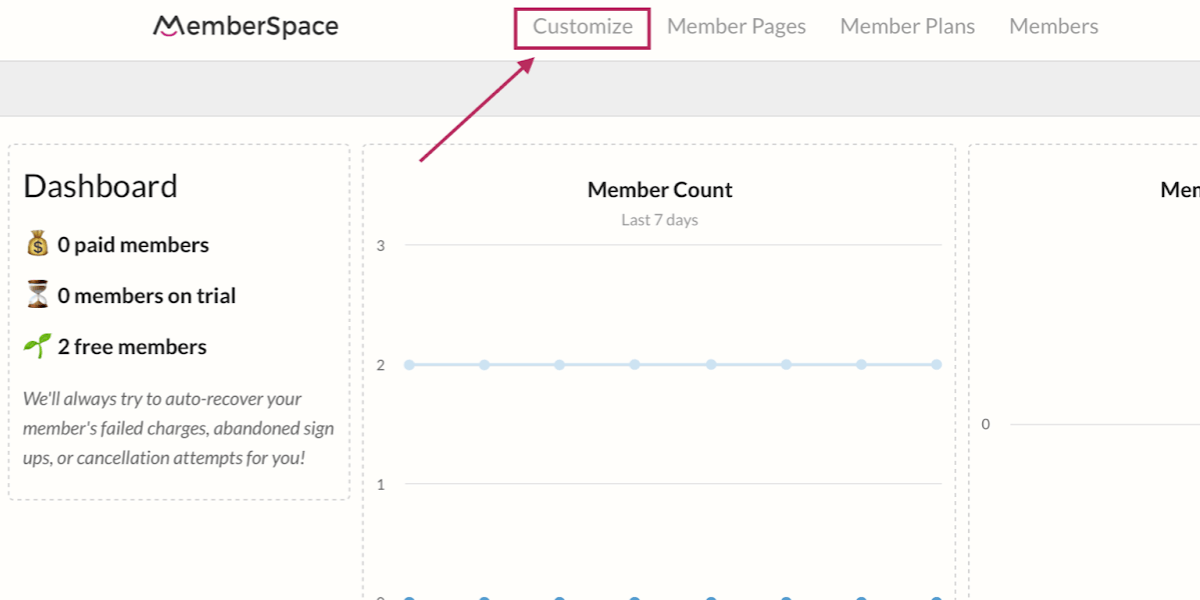
Go to your MemberSpace dashboard and click “Customize” at the top.
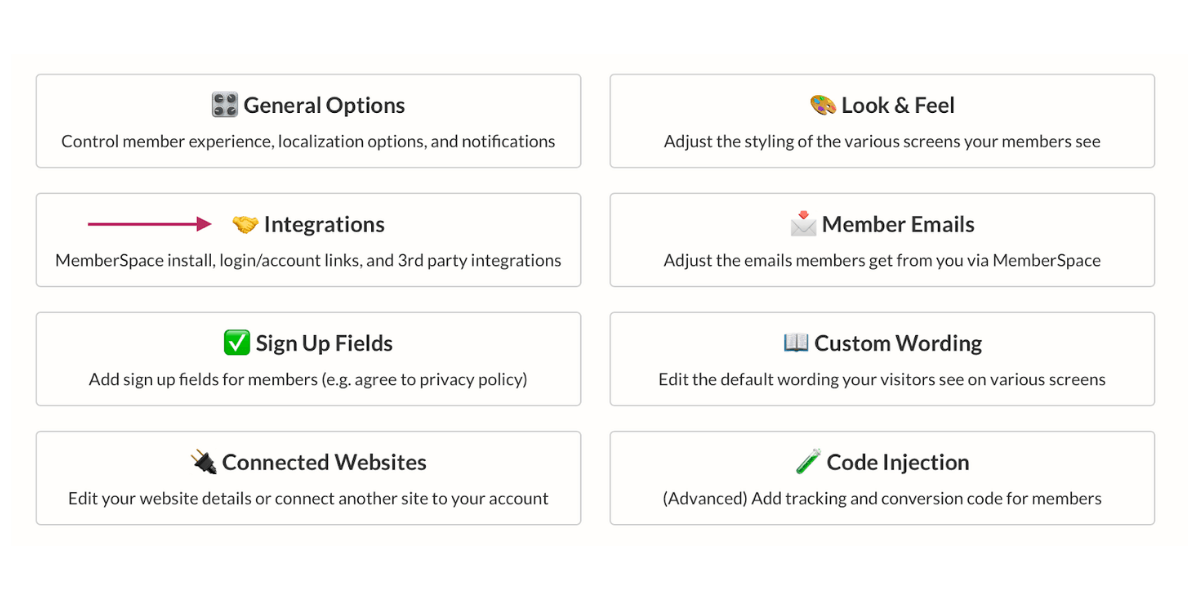
Next, click “Integrations.”
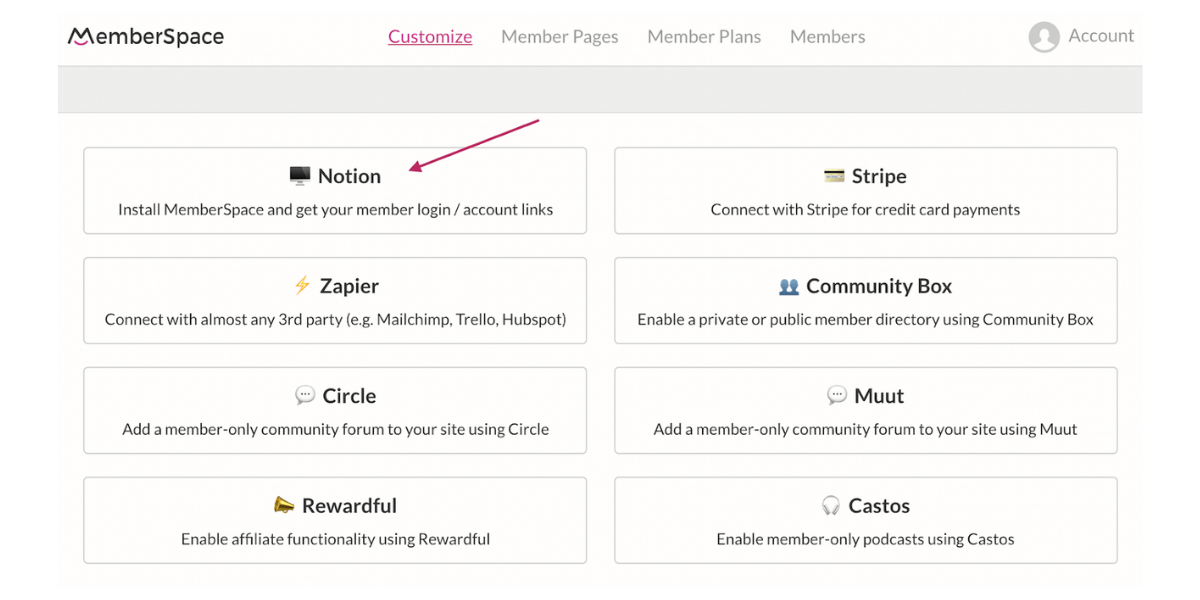
Click on “Notion.”
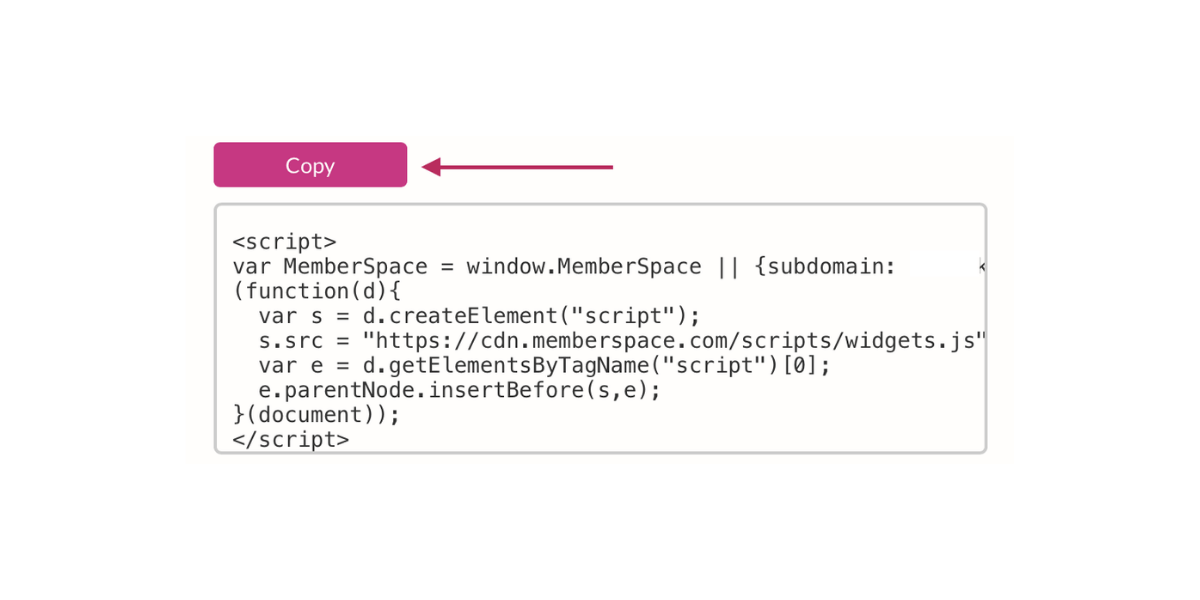
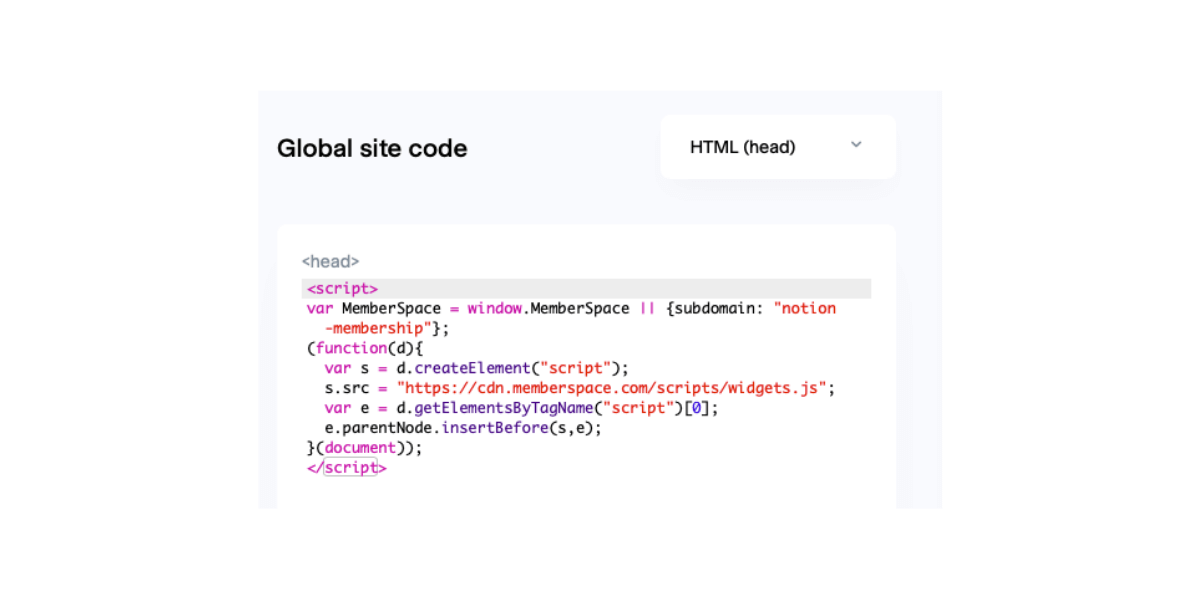
Under the section that says “100% Required Install Code,” click the pink button to copy it all.
Underneath this code, you’ll see a checkbox labeled “Display a Login/Account button.” Keeping this box checked will add a convenient login button to your site for returning members. If you don’t want the login button, you can un-check this box, but you’ll need to add a login popup instead.
Go back to the Super dashboard. Click the gear icon next to the preview of your Notion site. Next, click “options” in the left-hand sidebar.
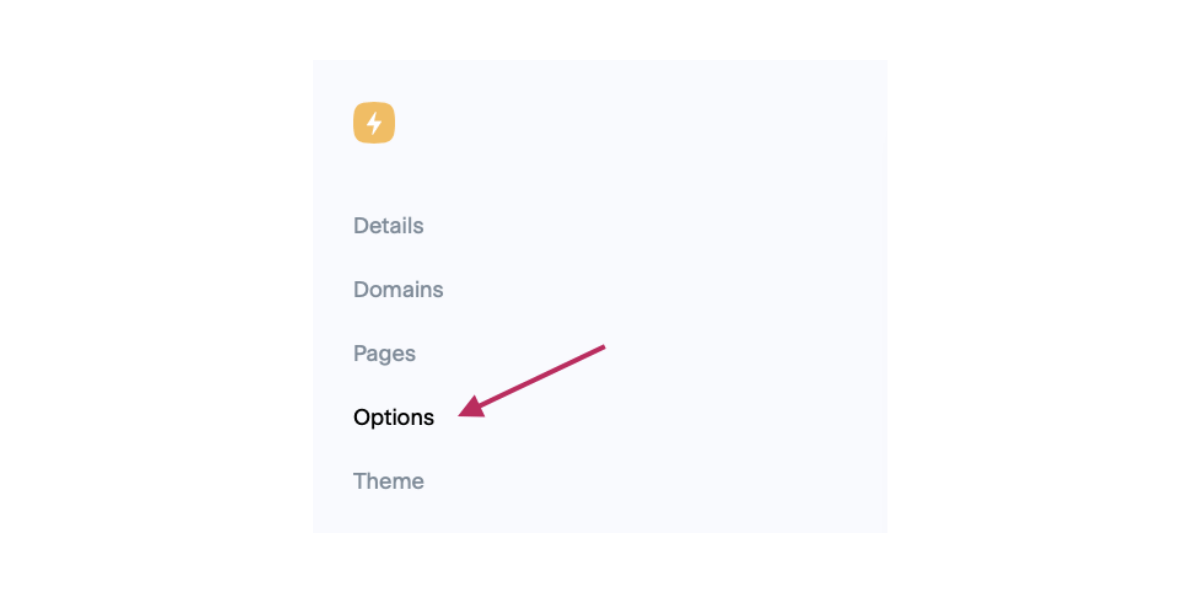
Under “Global Code Injection,” click “edit code.” Make sure the drop-down menu says “HTML (head)” and paste the code from MemberSpace in the box.
Step Four: Protect Member Pages
In step one, we temporarily made our Notion pages public. We’re now going to make sure that members-only areas are protected behind a login screen.
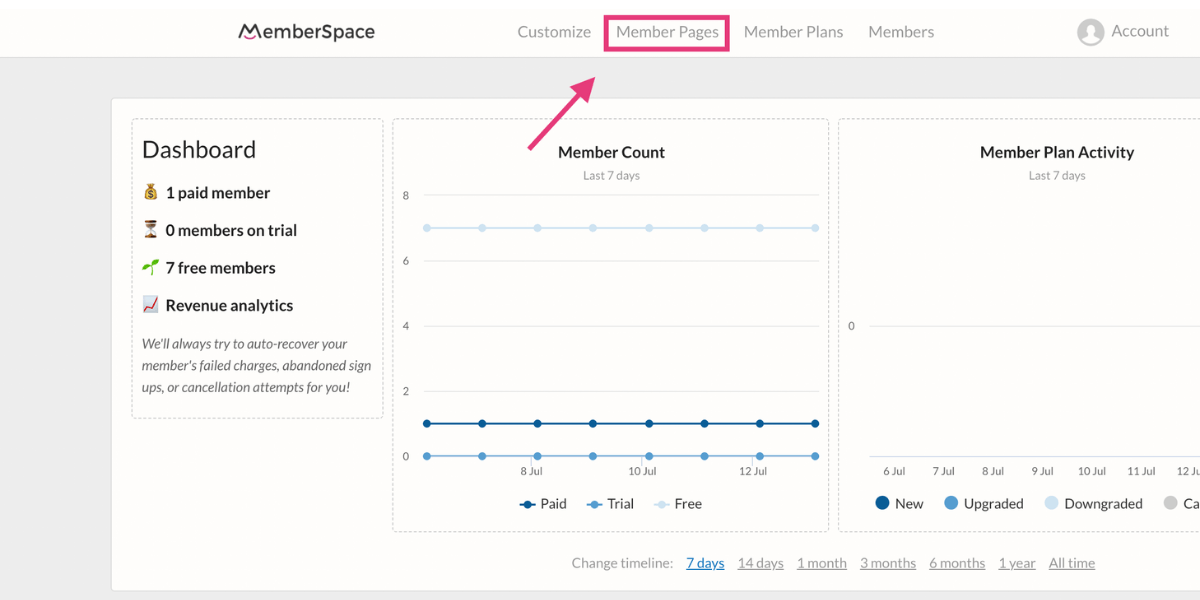
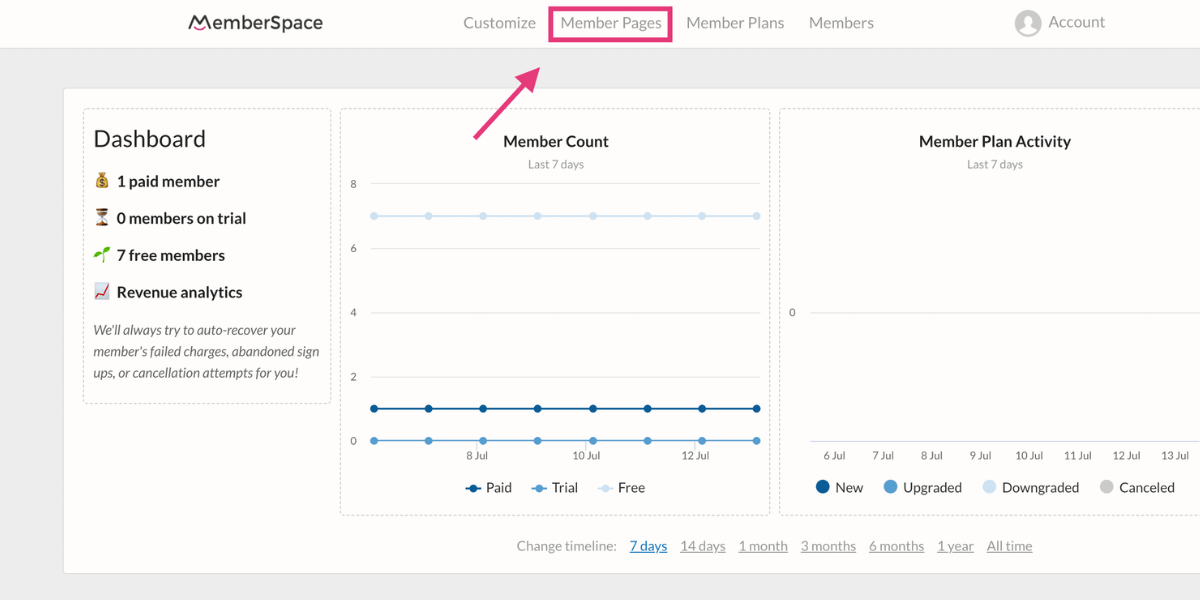
Go back to your MemberSpace dashboard. Click “Member Pages” at the top of the screen.
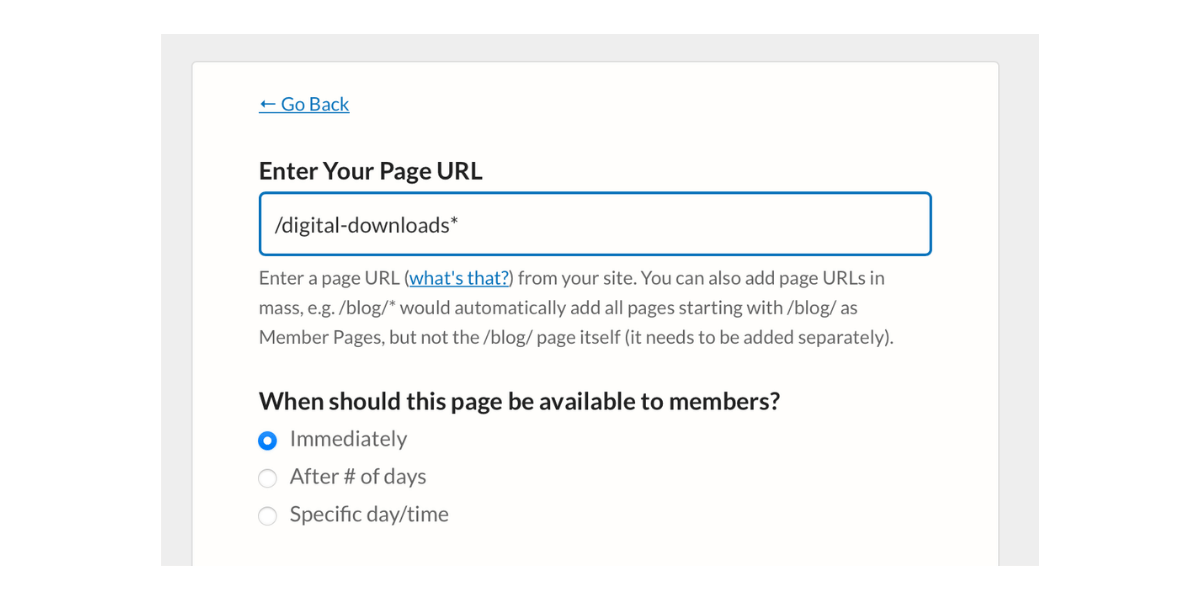
Next, click the pink “Protect Member Pages” button and enter the Super URL for your public landing page — not the Notion URL. Enter everything after and including the final slash. Place an asterisk at the end:
MemberSpace will now automatically protect all of the “secret” members-only pages you nested under this public page in your Notion workspace.
Click “Add Now” to save.
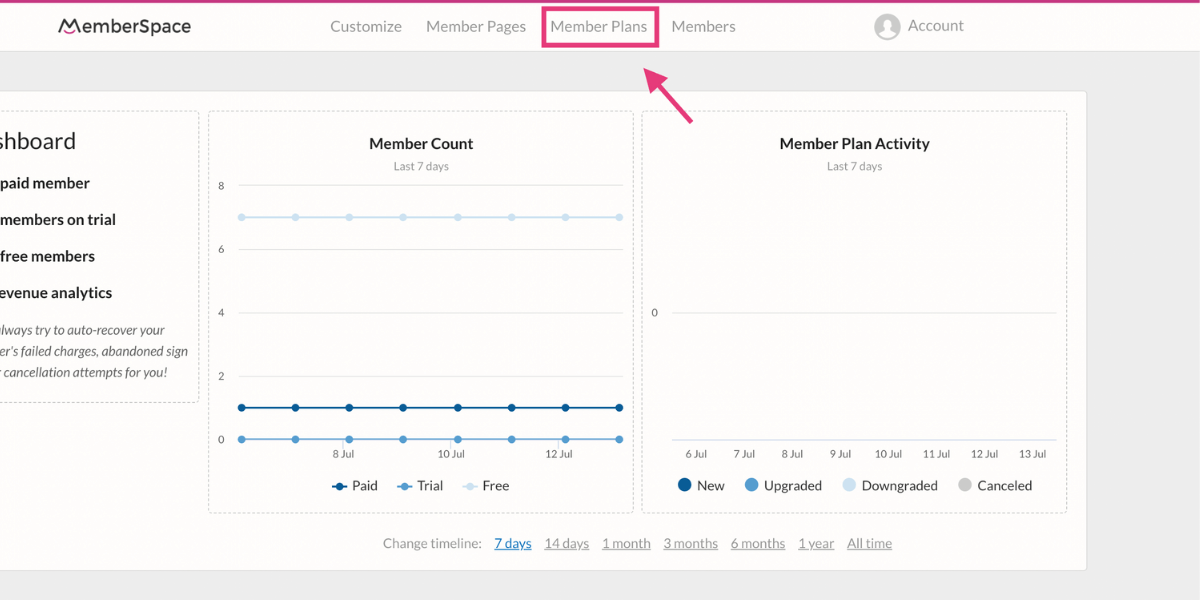
Step Five: Set Up Member Plans
From the MemberSpace dashboard, click “Member Plans.”
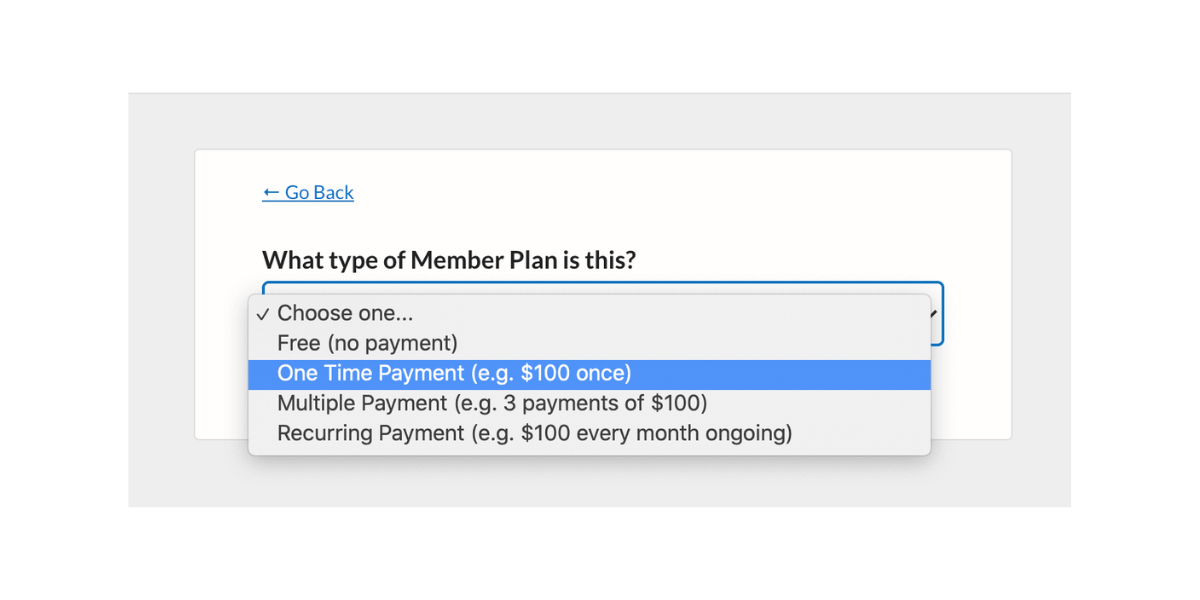
Click the pink “Create Member Plans” button. Under the “What type of Member Plan is this?” drop-down, select “One Time Payment.”
On the next screen, you can give your plan a name and price. In this example, we’re charging our customers $9.99 for one download.
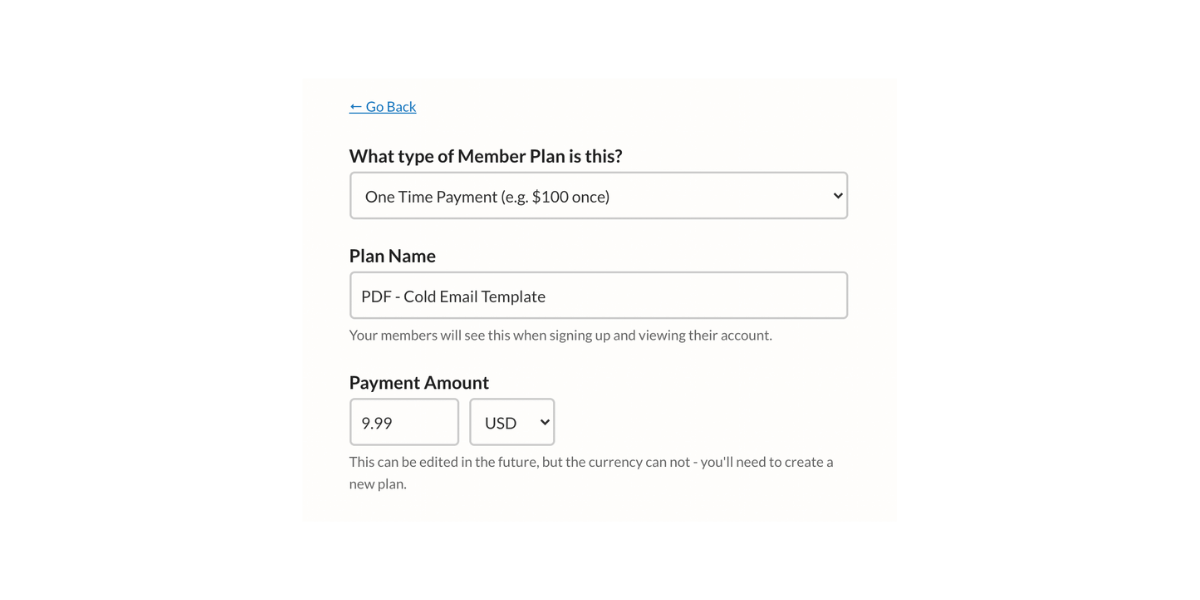
If you need to collect sales tax, you can enter those details here as well.
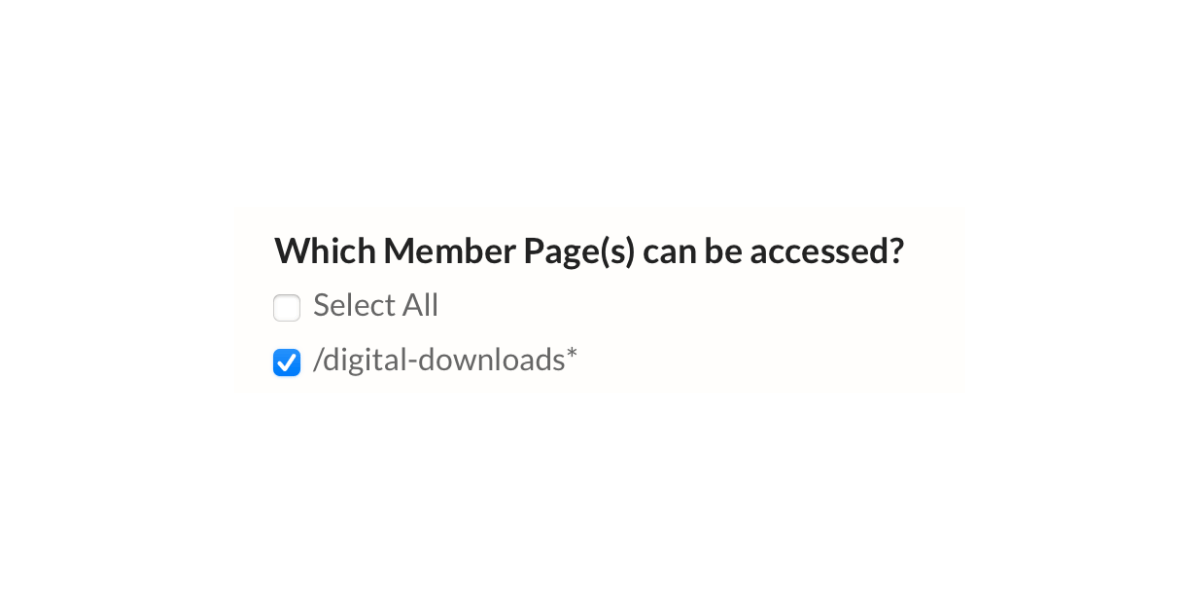
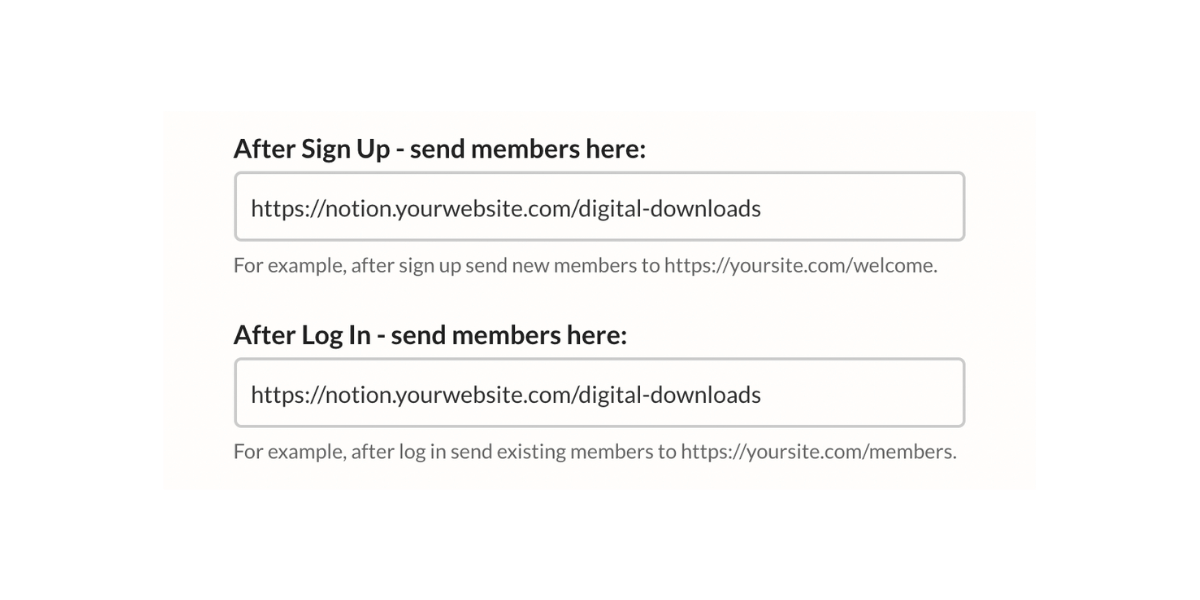
Scroll to the section titled “Which Member Page(s) can be accessed?” and select the URL we protected in step six. The public URL is still accessible, but the “secret” page is now only available to plan members.
Without closing this screen, go back to Super and grab the pretty URL for the first “secret” page members should see once they’re logged in. Paste it in the fields below, including the https://.
Click the pink “create this plan” button to save.
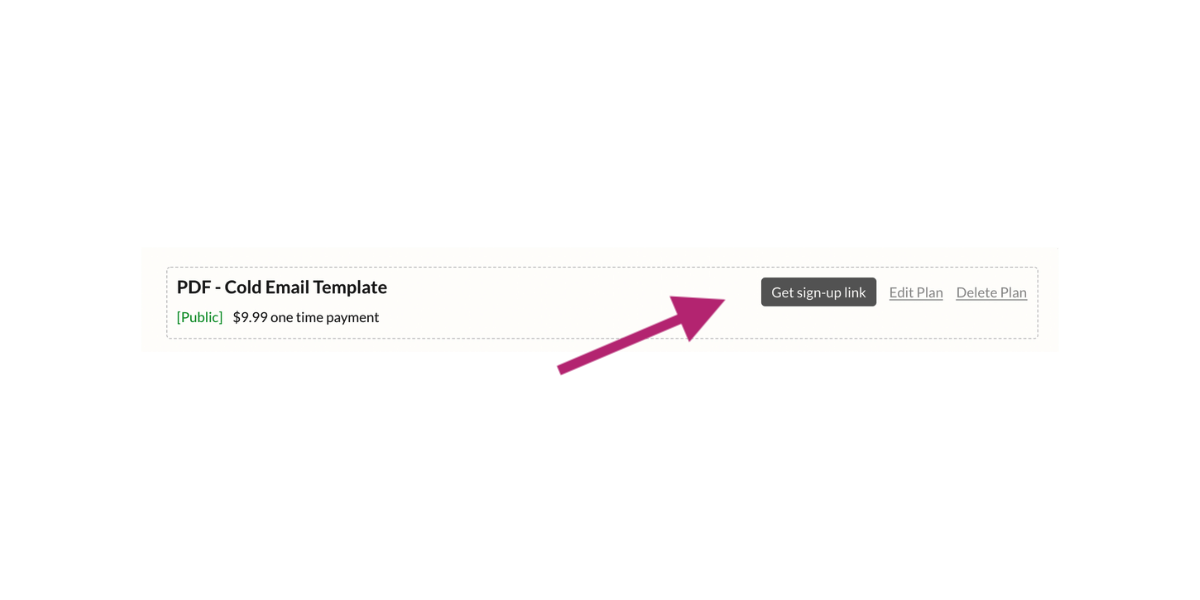
Finally, click the “get signup link” button to copy the registration URL for this new plan. Place this URL on your public Notion landing page so customers can purchase the digital product.
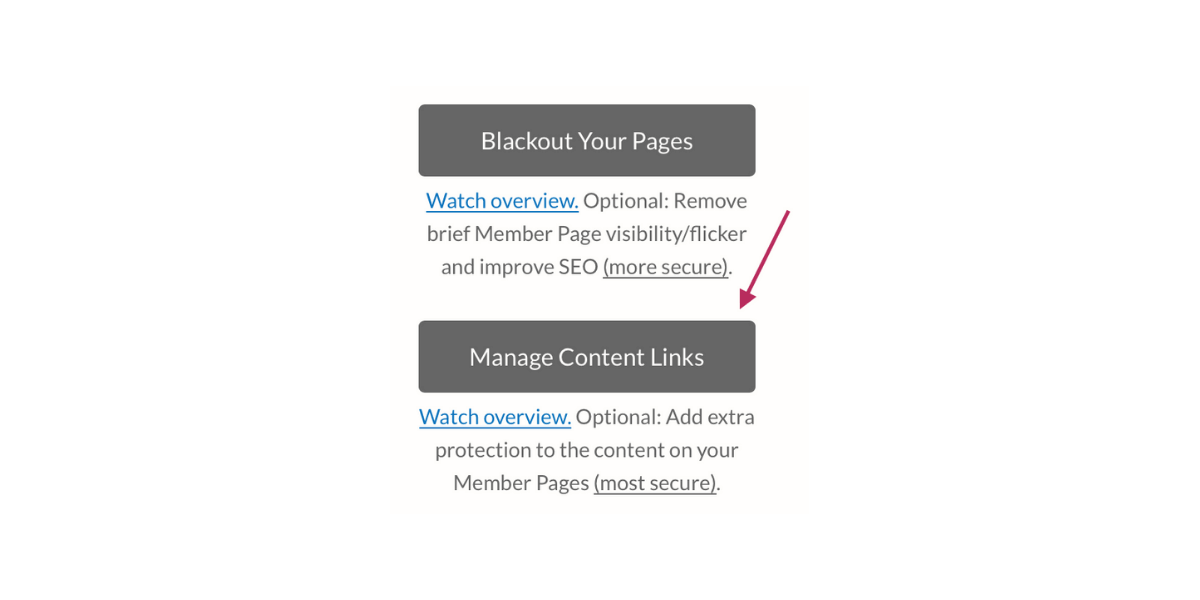
Step Six: Protect Your Digital Products with Content Links
As a final step, we’re going to upload our digital products to MemberSpace via the Content Links feature. Content Links add an extra layer of protection onto your products, versus uploading them directly to Notion. By generating a Content Link, you get extra assurance that your digital products are only accessible to paid customers.
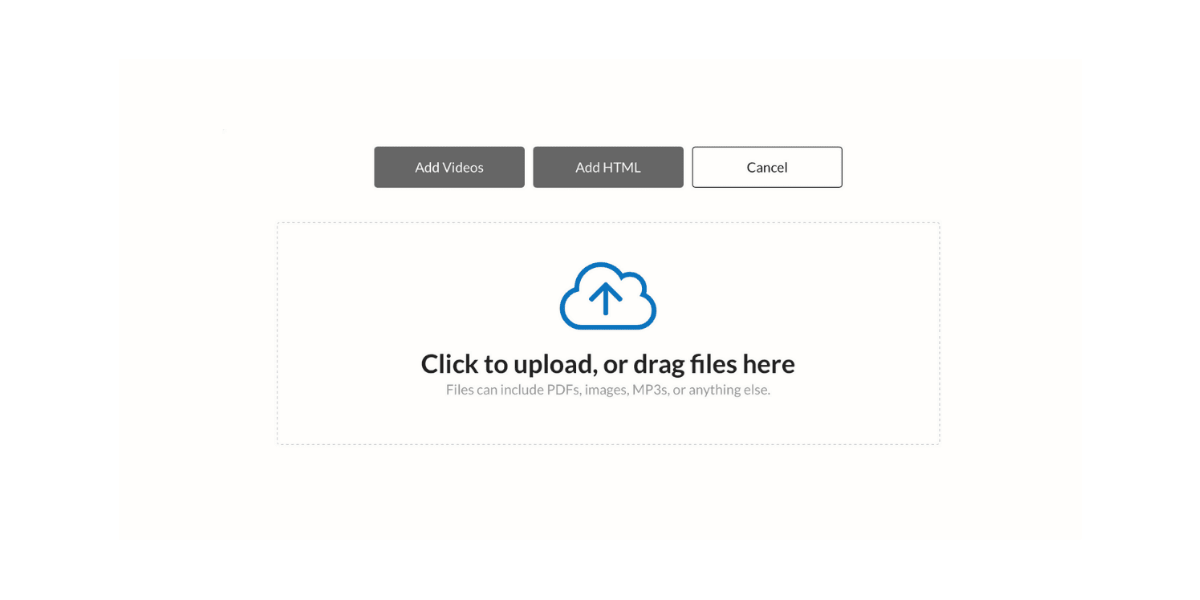
Start by clicking “Member Pages” at the top of your MemberSpace dashboard.
Click the gray “Manage Content Links” button.
Upload your files by dragging and dropping them into the middle of the screen. You can also click “Add Videos” and paste a YouTube, Vimeo, or Wistia link.
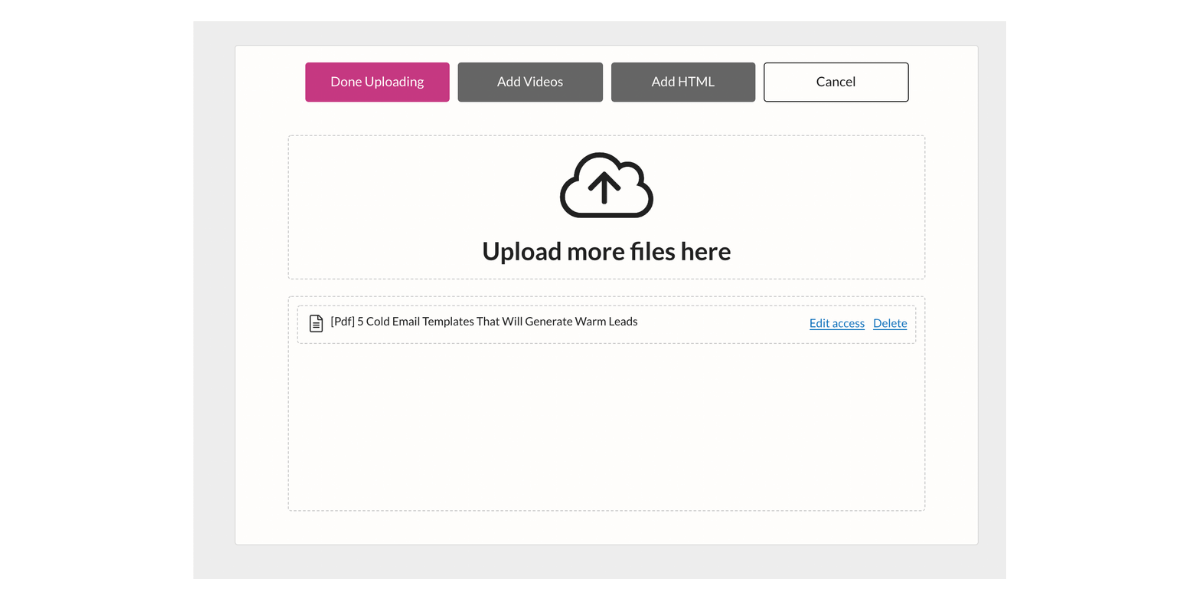
After you’re finished adding content or video links, click “Edit Access” next to a file name.
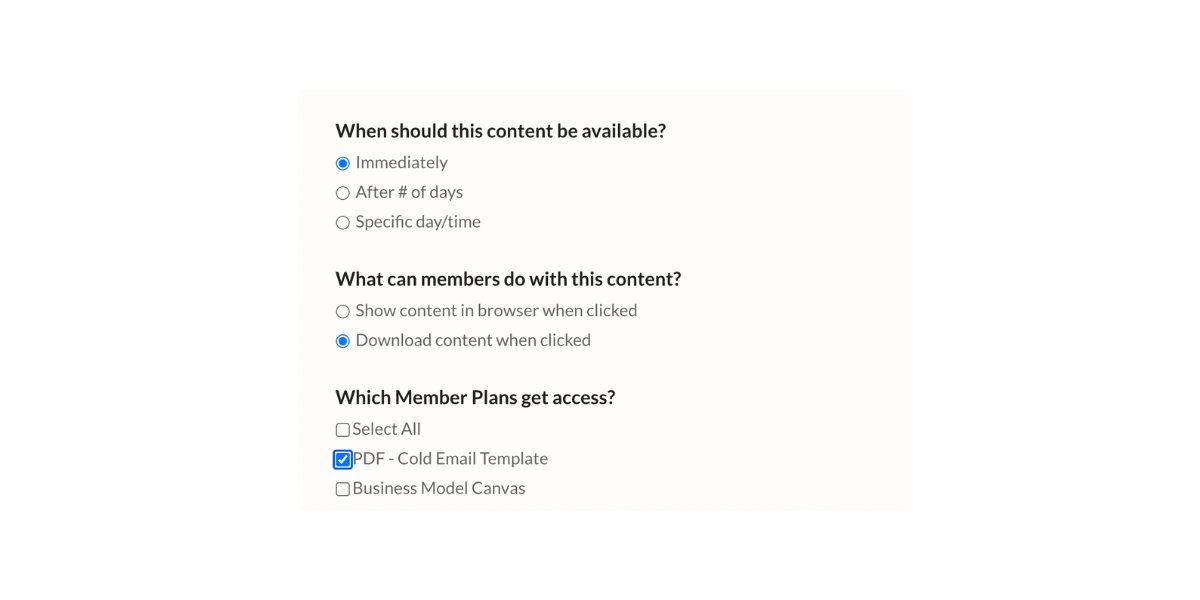
A new screen will open up. Here, you can indicate how and when the content should be available to customers.
When finished, click “Update Now” and repeat for all of your digital product files. Click “Done Uploading” when finished.
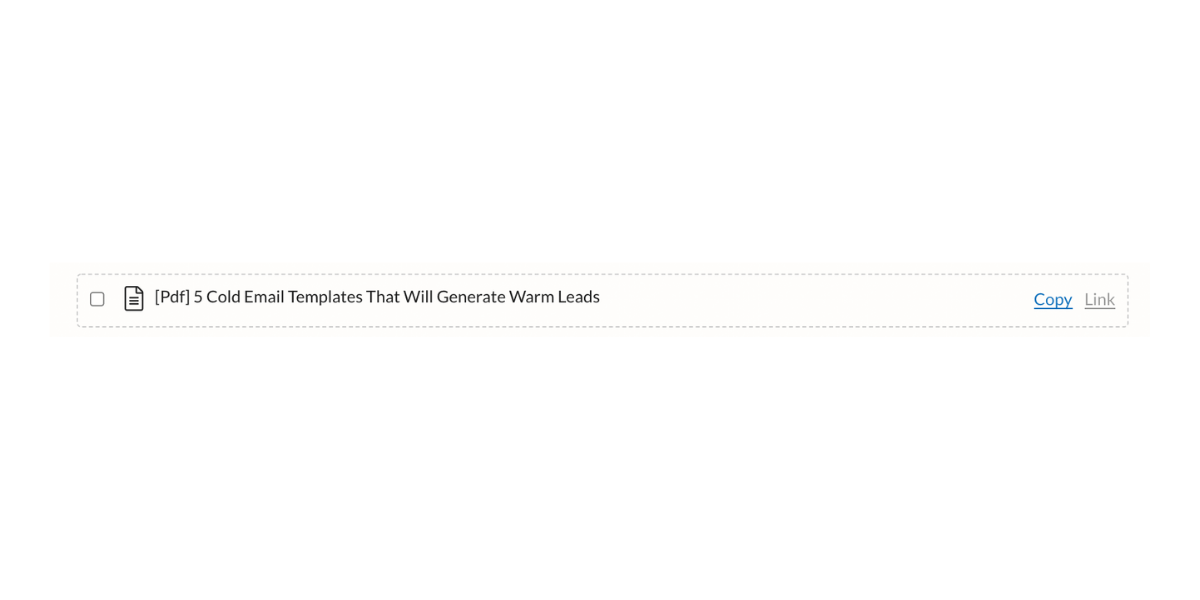
MemberSpace displays all of your content files in a list. Click the “copy” hyperlink next to any file name to generate a unique, protected URL. Use this link on your post-purchase download pages.
Congratulations! You’ve just finished setting up your first digital products membership site on Notion.
Don’t forget to test your digital products site before launch! Set up a free plan or create a 100% off coupon code and use it to “purchase” a product. You can delete this coupon or plan when you’re satisfied with the customer experience!
Growing Your Sales of Digital Products with Notion
Once you have your digital products website set up with Notion, it’s easy to add more items for sale. As your list of products grows, you may want to migrate to a content library model that gives members access to every file for a flat monthly rate. (We even put together a membership toolbox full of useful services and software to help you keep growing.)
Don’t forget to show us how you’re selling digital products with Notion and MemberSpace! Share a link with us on Twitter, Facebook, LinkedIn or in the private MemberSpace community.