Carrd is a one-page site builder that makes beautiful web design accessible to everyone, even beginners. For only $19 per year, you can build fully custom landing pages, connect your own domain names, and pick from a wide library of attractive themes.
When you pair Carrd with MemberSpace, it becomes the perfect solution for launching and running a membership business. There aren’t any cumbersome plugins or widgets to fiddle with - everything is contained in Carrd and MemberSpace. All you need is:
- A Carrd Pro plan
- A MemberSpace plan
- A free Stripe account to process payments
It’s so quick that you can fire up the Carrd website builder over your morning coffee and be ready to launch a membership business by lunch.
Seriously! Here’s how it works.
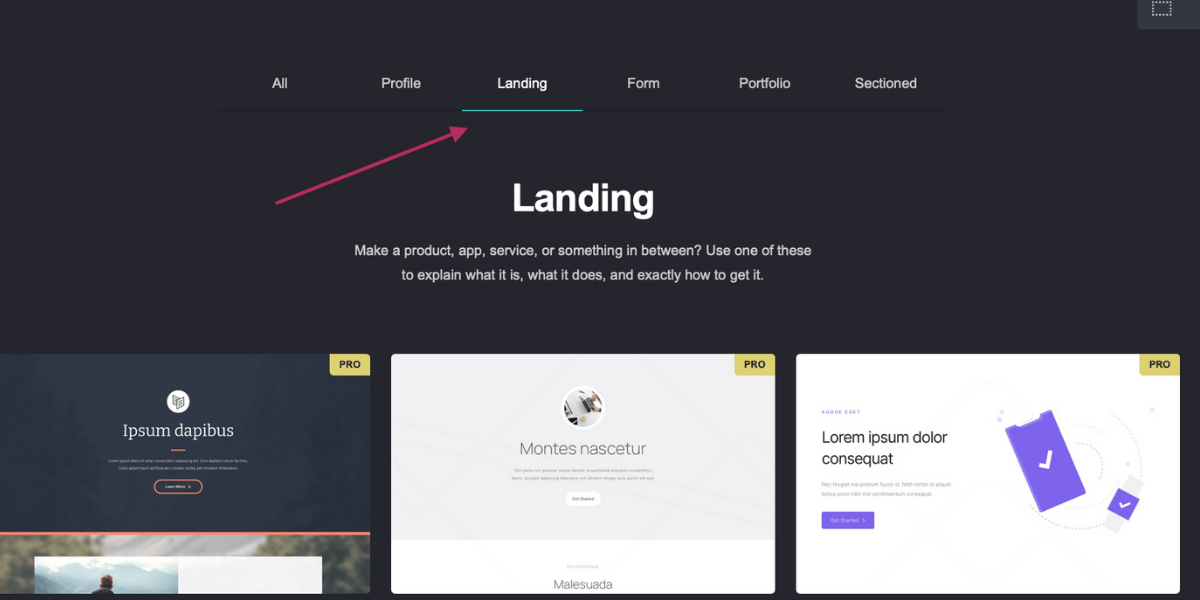
Step One: Create a One-Page Carrd Website
Start by logging into your Carrd Pro plan and choosing a template from the “landing” section. Click “select” on your preferred design when you are ready to proceed.
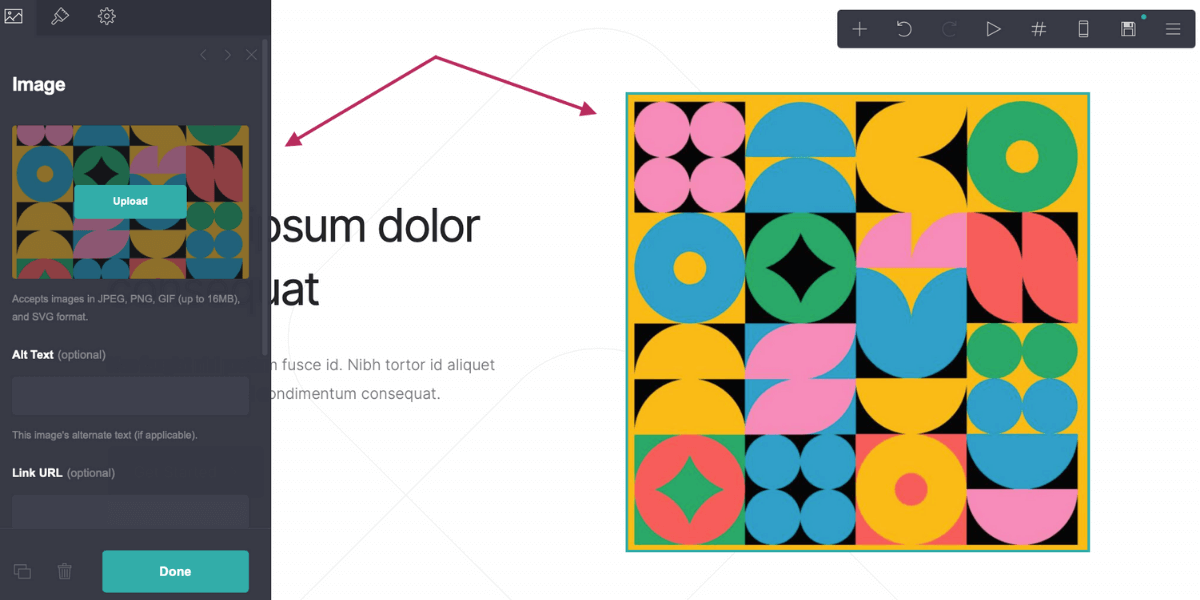
Carrd uses “containers,” which are rectangular sections of your website that hold buttons, text, and images. Every time you add a new element to your website, it should be placed inside of a container.
We’re going to make the top container into a welcome section with text and an eye-catching hero image. Click any placeholder in your template to edit or delete it.
Next, we’ll add another section by clicking the plus sign and selecting “container.”
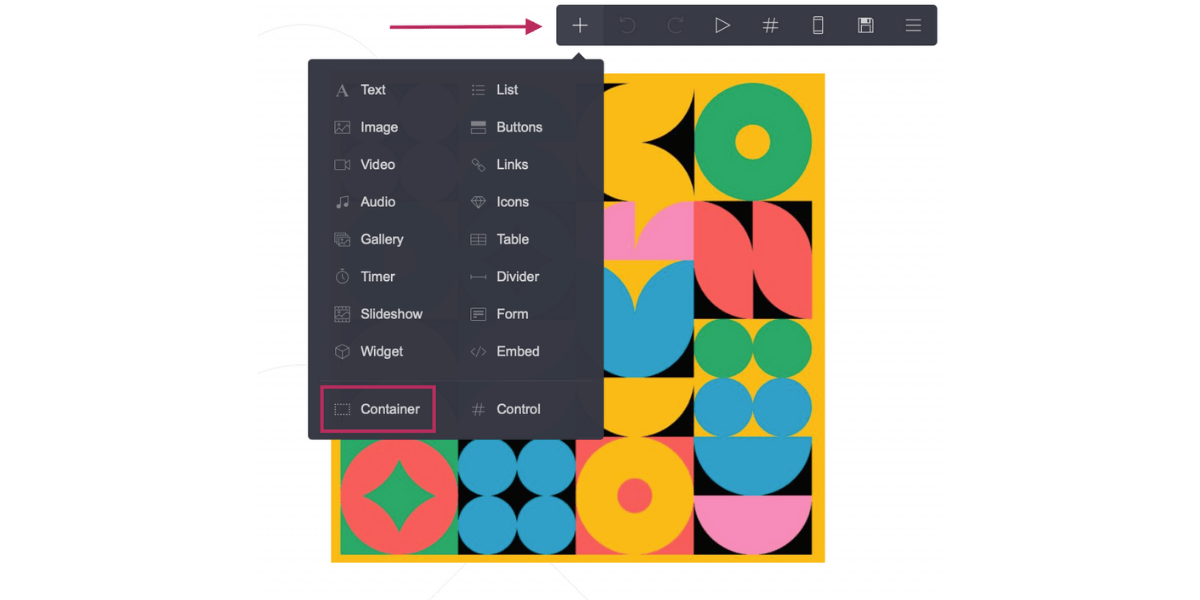
This new container is where we’ll put information about our downloads and plans. Add some buttons, but don’t worry about linking them to anything just yet.
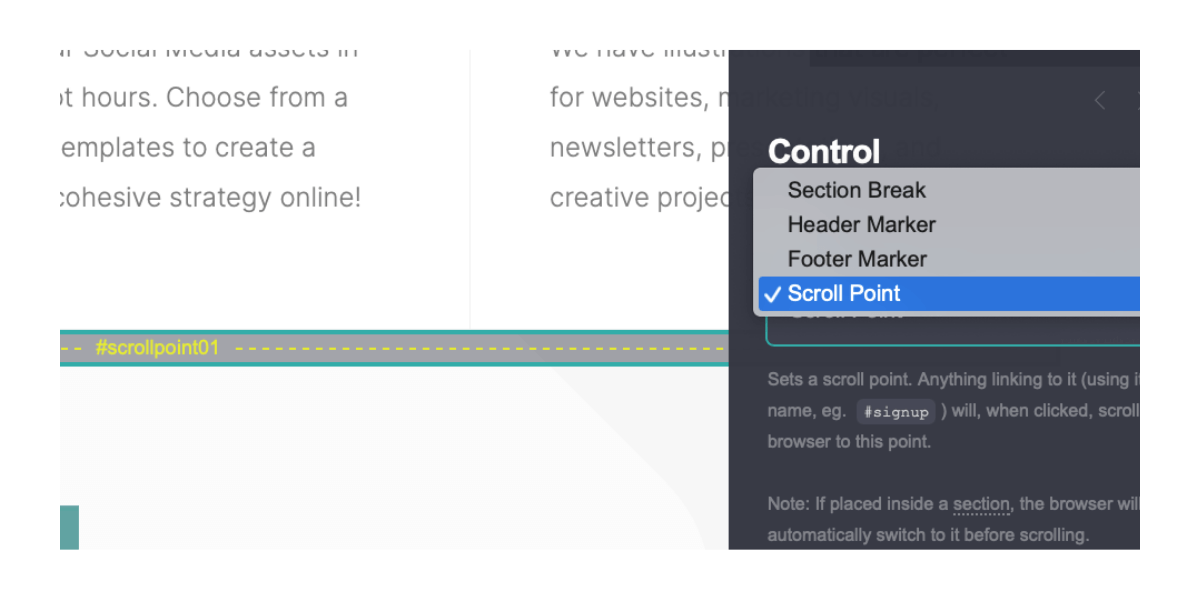
Beneath this container, we’re going to add a scroll point that lets you link to a section of the page. Click the plus sign and select “#control.”
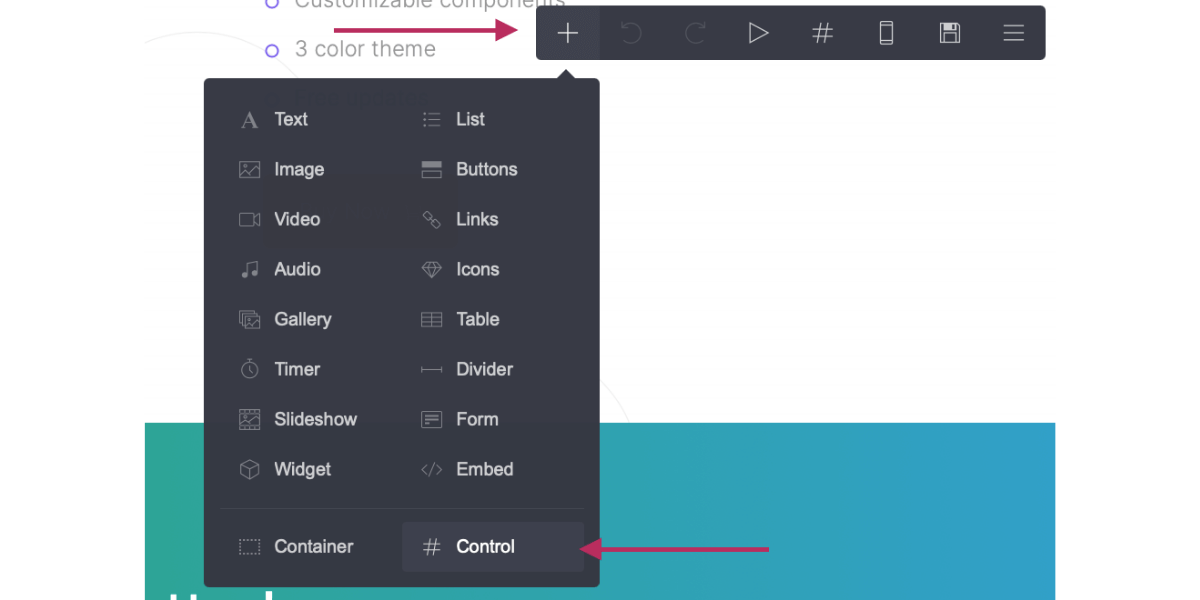
Choose “Scroll Point” from the drop-down menu.
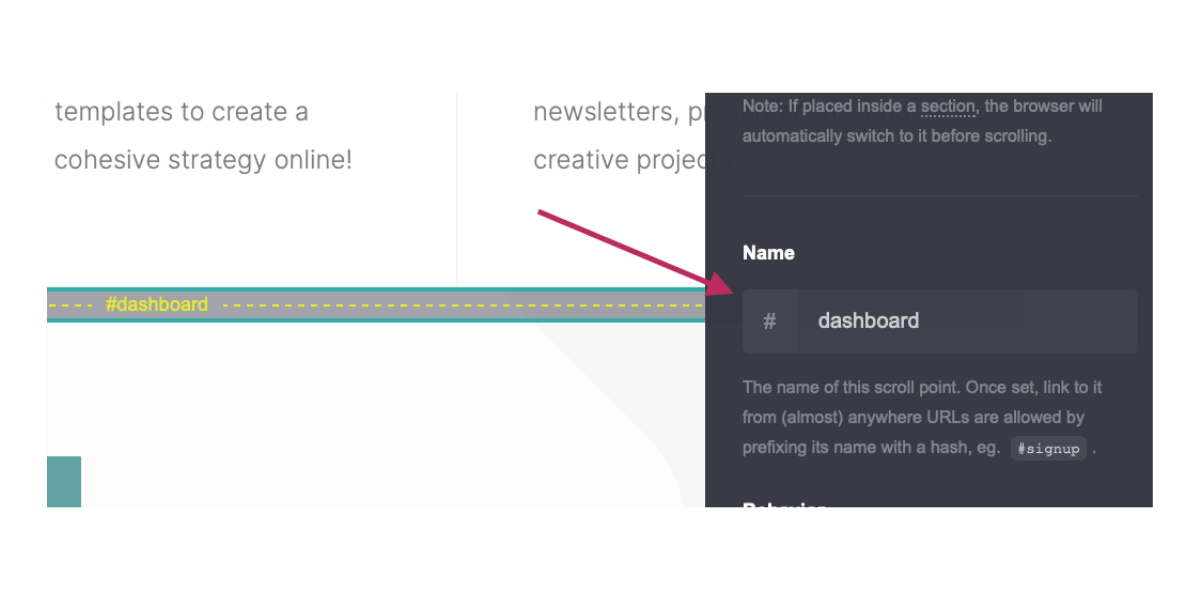
Change the title to “dashboard.”
Finally, add another container underneath your new scroll point. This is where your members-only content and links will go. We’ll come back and add all that good stuff shortly.
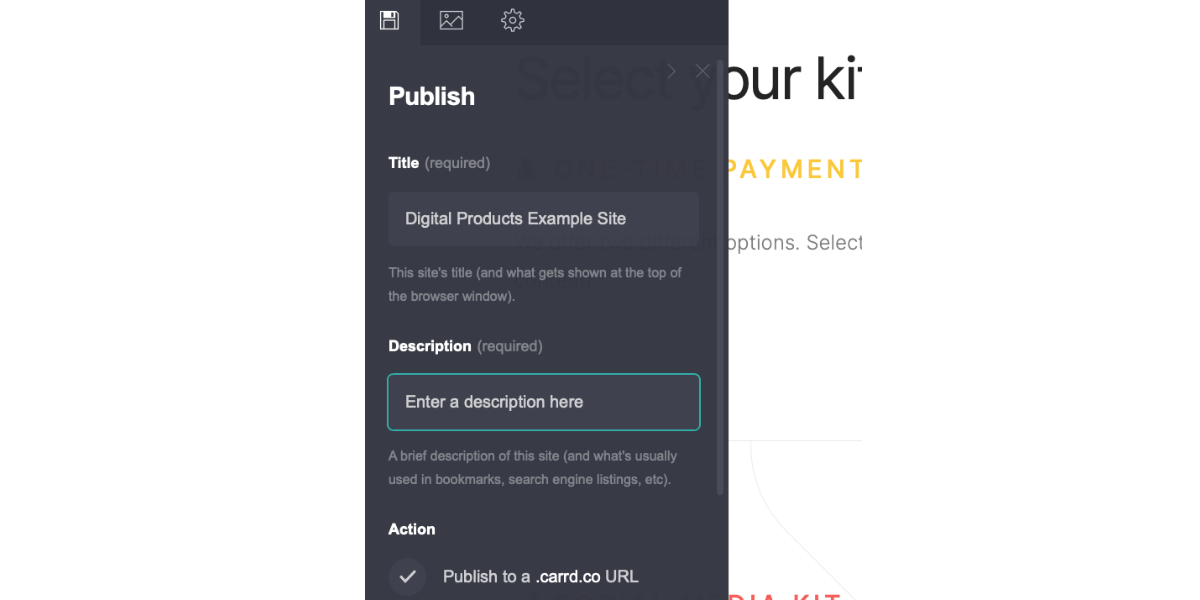
Save your progress by clicking the menu button and selecting “publish.”
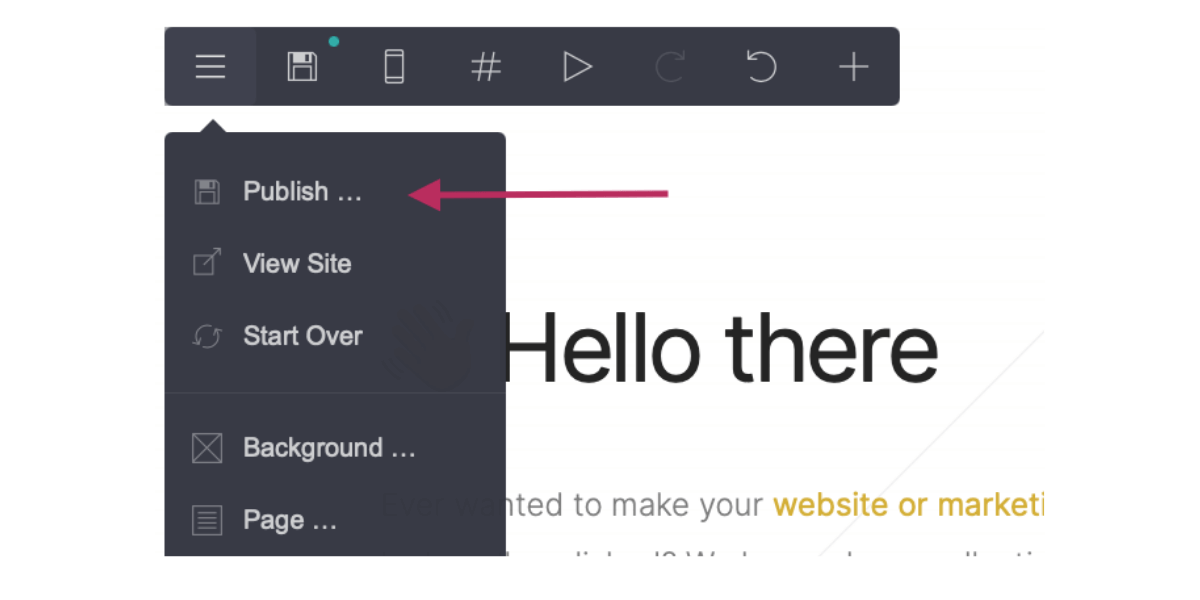
Enter a page name and description. You can opt to use a carrd.co subdomain or follow the instructions to link your custom domain. Click publish to save.
Step Two: Set Up Pricing Plans in MemberSpace
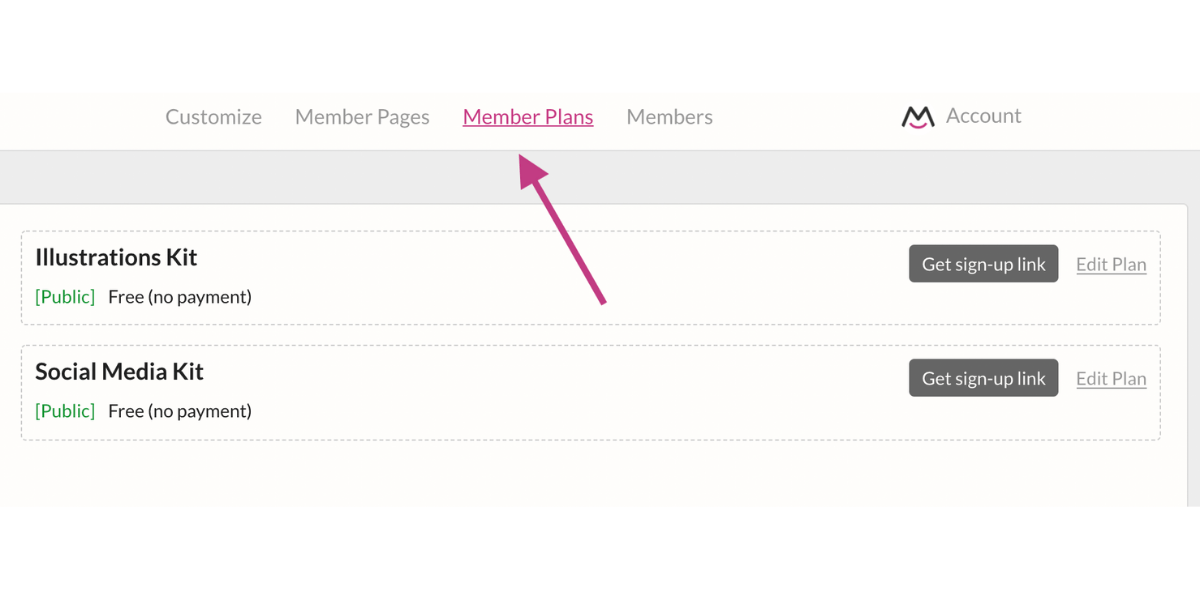
It’s now time to set up your plans and prices in MemberSpace. Log into your MemberSpace dashboard and click “Member Plans” at the top.
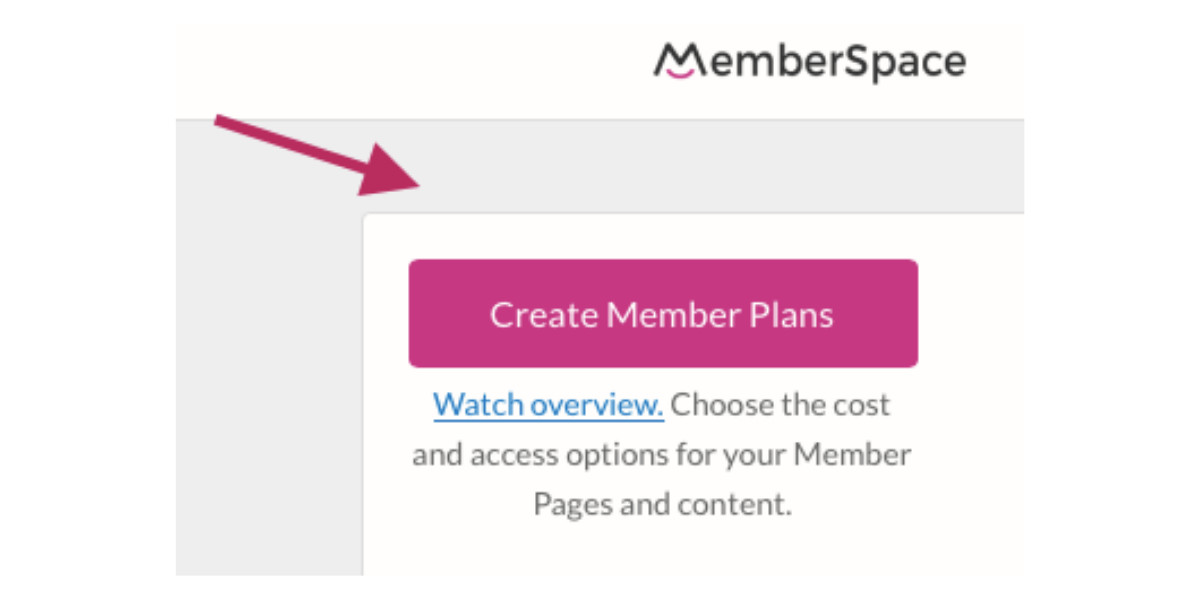
Click the pink “Create Member Plans” button.
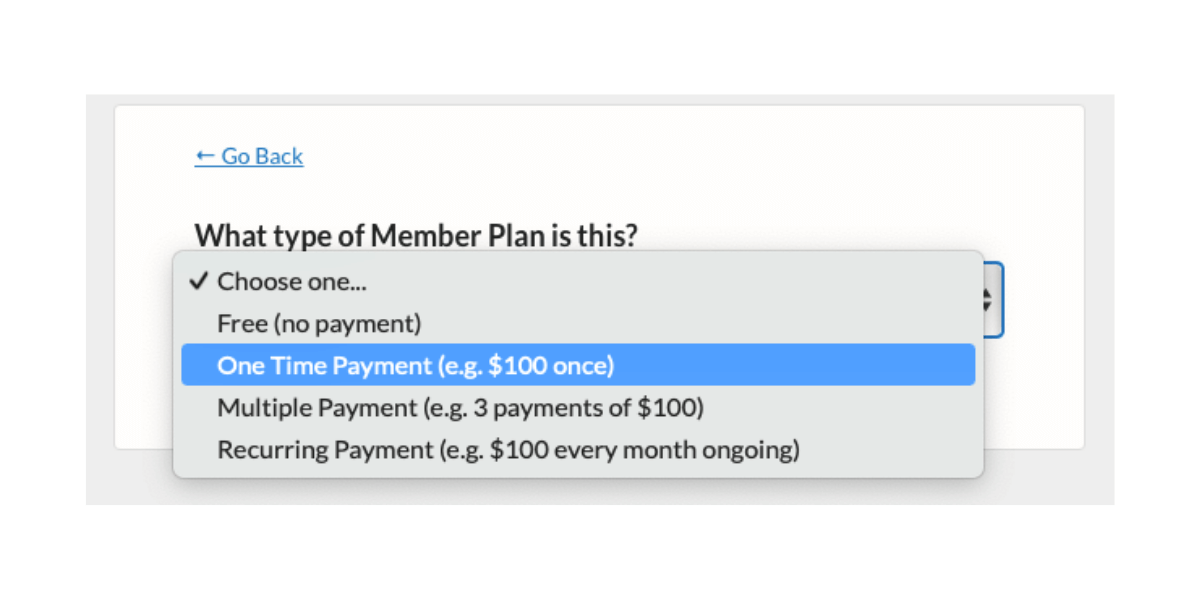
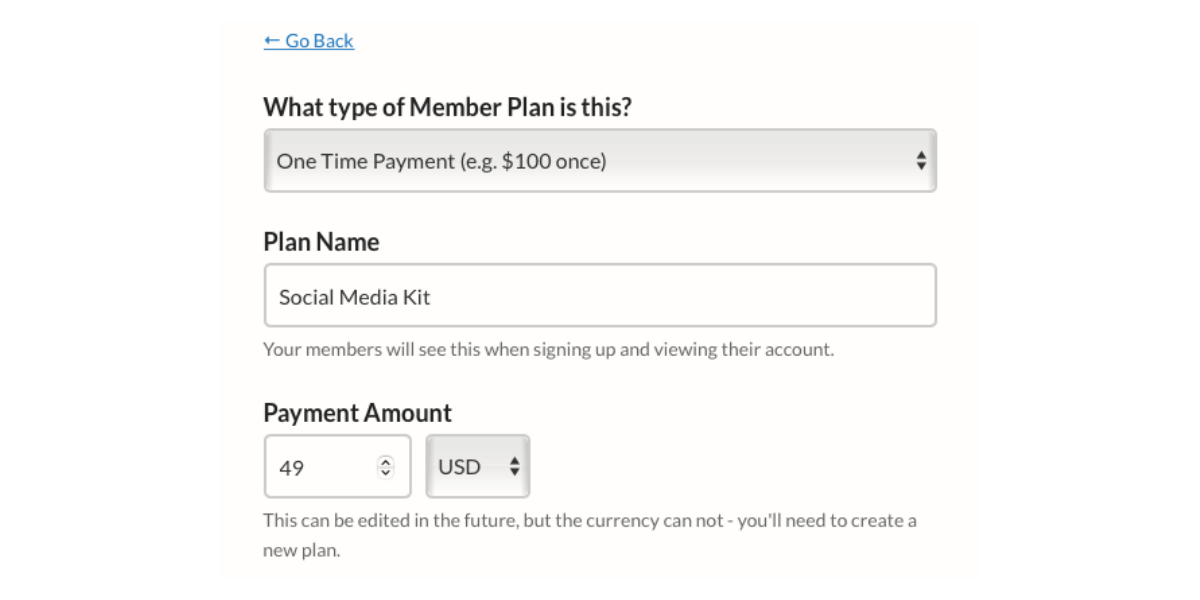
Select “one time payment” from the drop-down menu.
Give your plan a name and a price.
In the URL section, type the full URL associated with your Carrd site and place the scroll point name at the end with a slash and a hashtag:
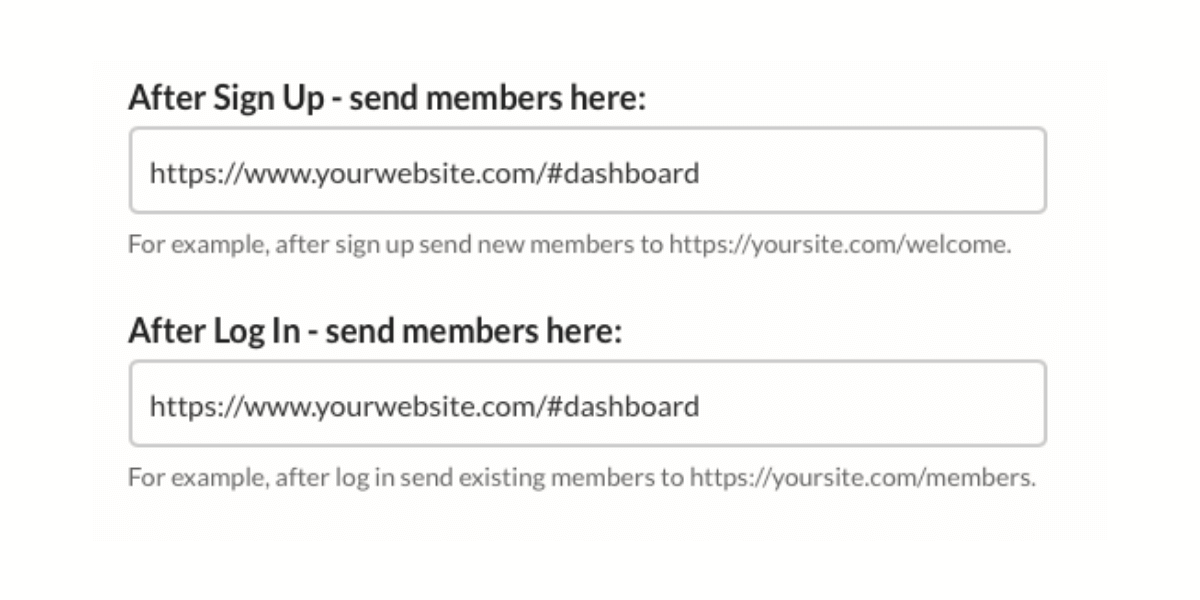
As soon as someone purchases this plan or logs in to their account on your site, they will be immediately redirected to this private area.
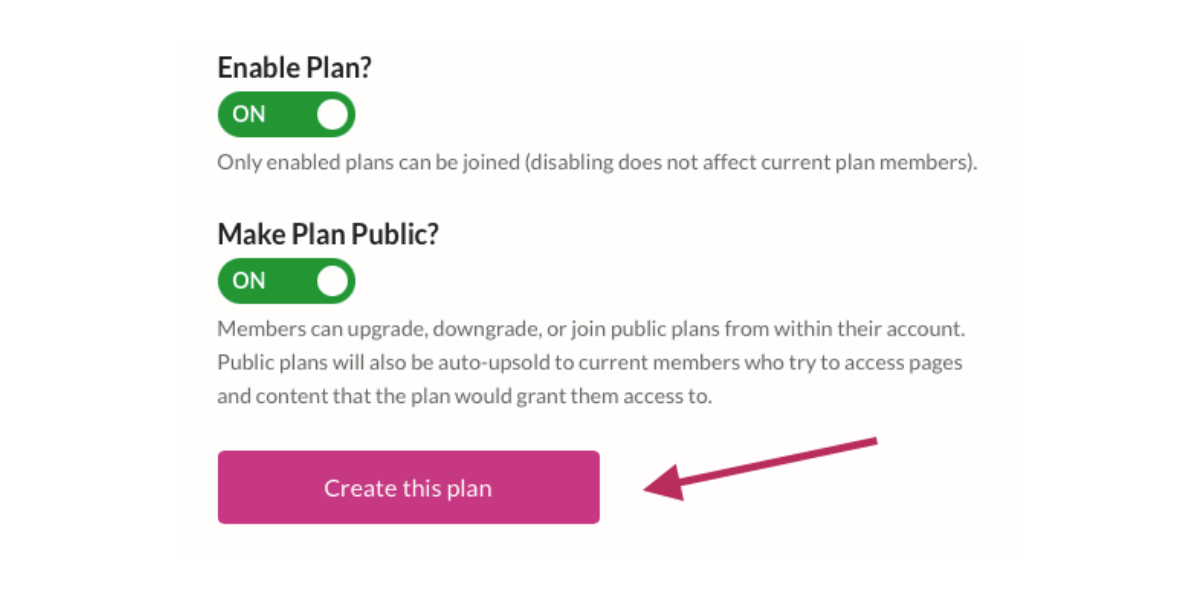
Click “create this plan” to save.
Step Three: Add Sign-Up Links to Your Carrd Website
After saving your new member plans, you’ll see a gray “Get Sign-Up Link” button next to the plan name. Click this to copy the URL.

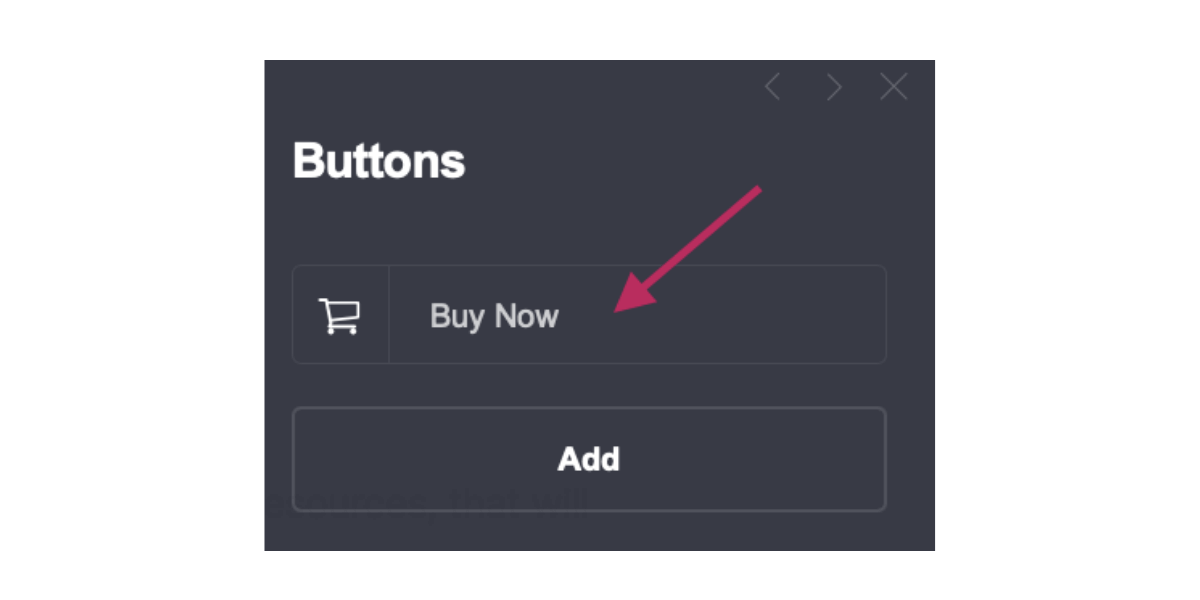
Go back to your Carrd site and scroll down to the plan info container. Select the button that users will click when purchasing a download.
Click on the name of the button in the settings window that opens up.
Paste the sign up link you just copied from MemberSpace.
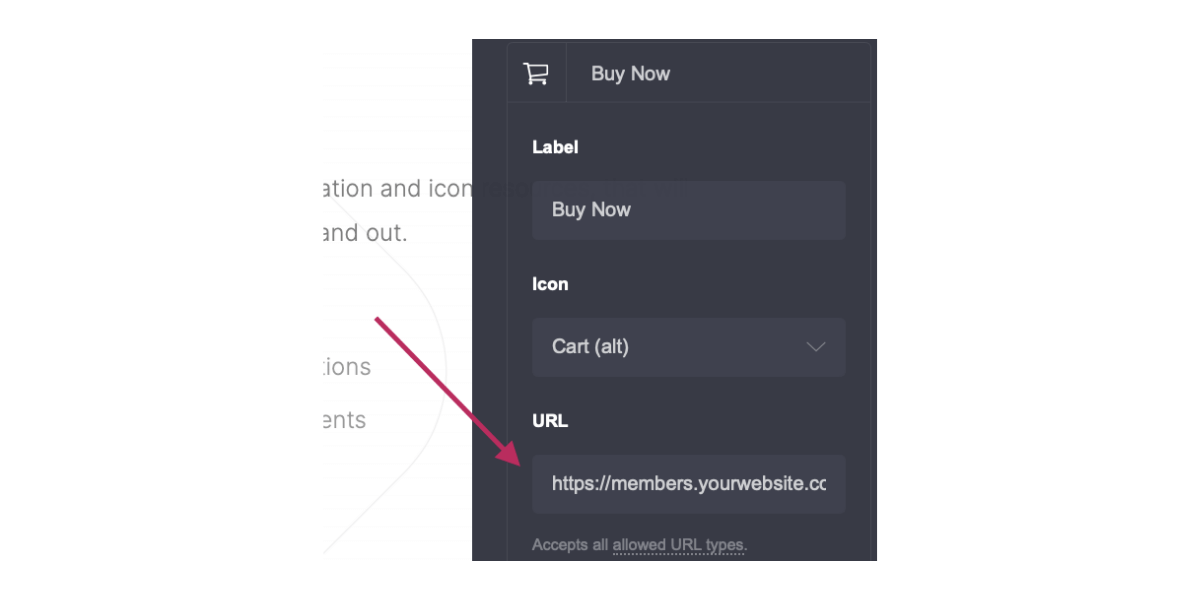
Save and repeat for any additional buttons and plans.
Step Four: Connect MemberSpace and Carrd
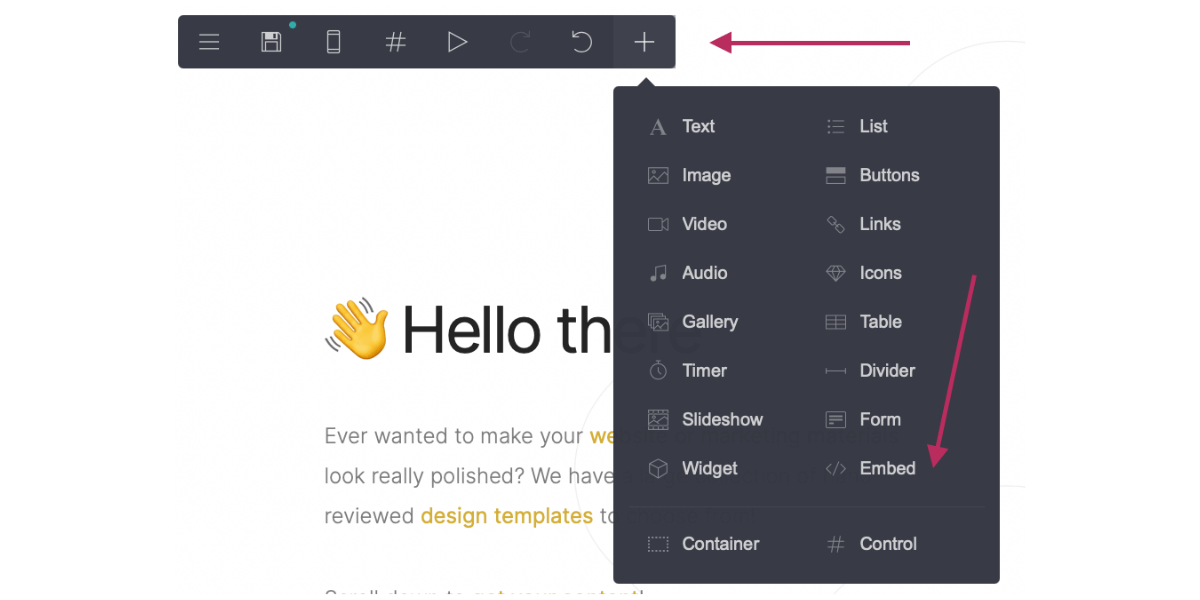
Now it’s time to install MemberSpace on your Carrd site.
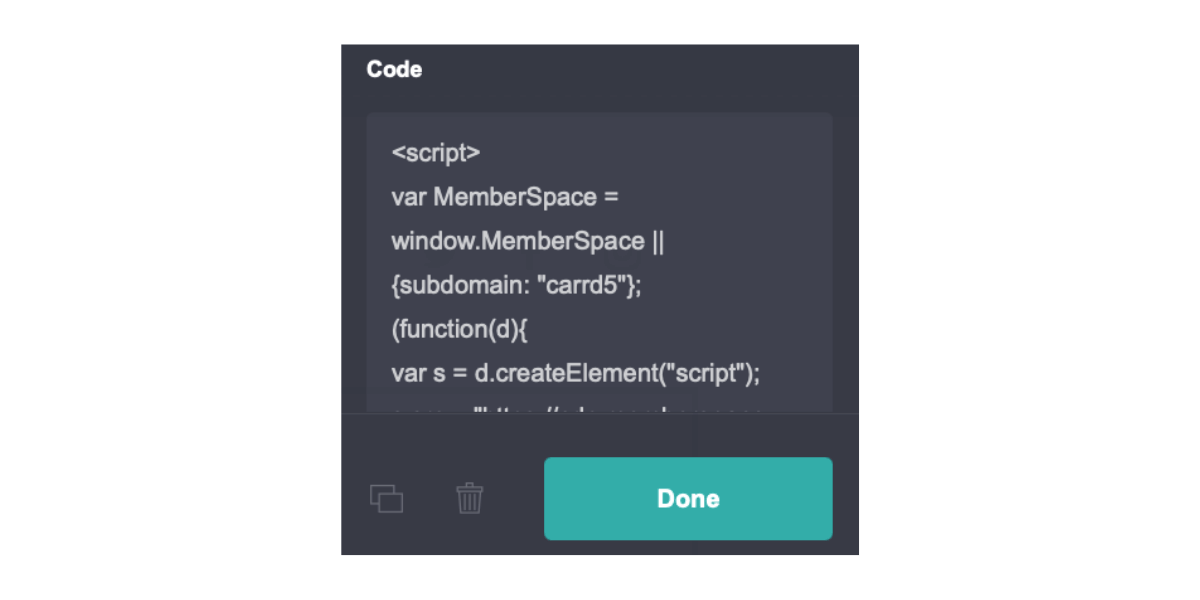
Click on the plus sign in the menu bar and select “</>embed.”
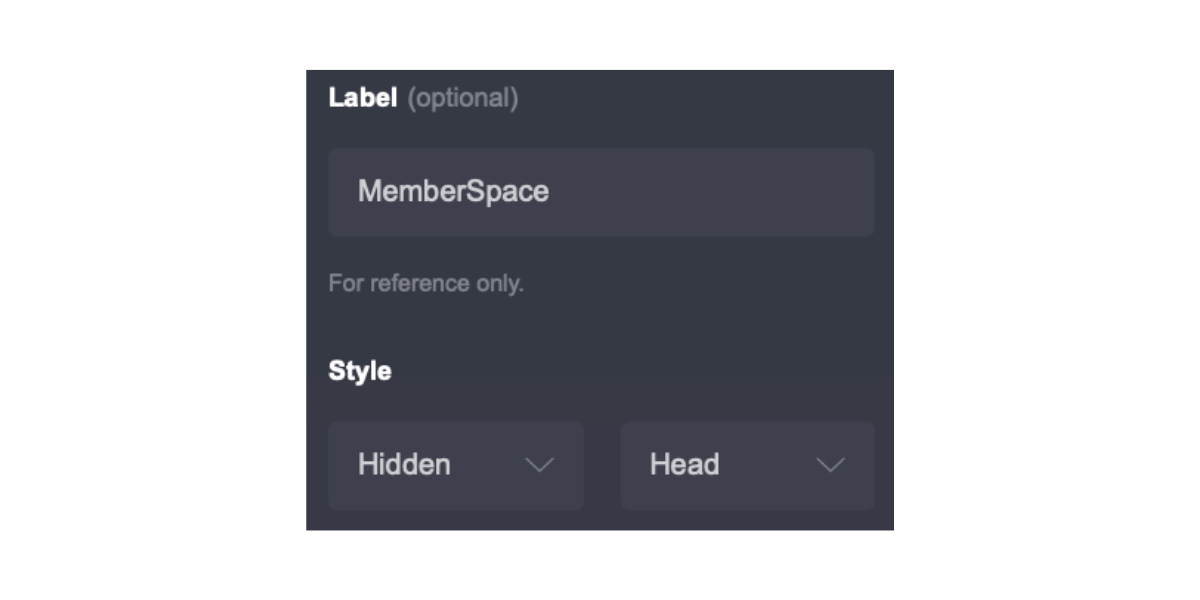
In the settings menu that opens up, enter “MemberSpace” in the label field. Select “hidden” as the style, and then choose “head.”
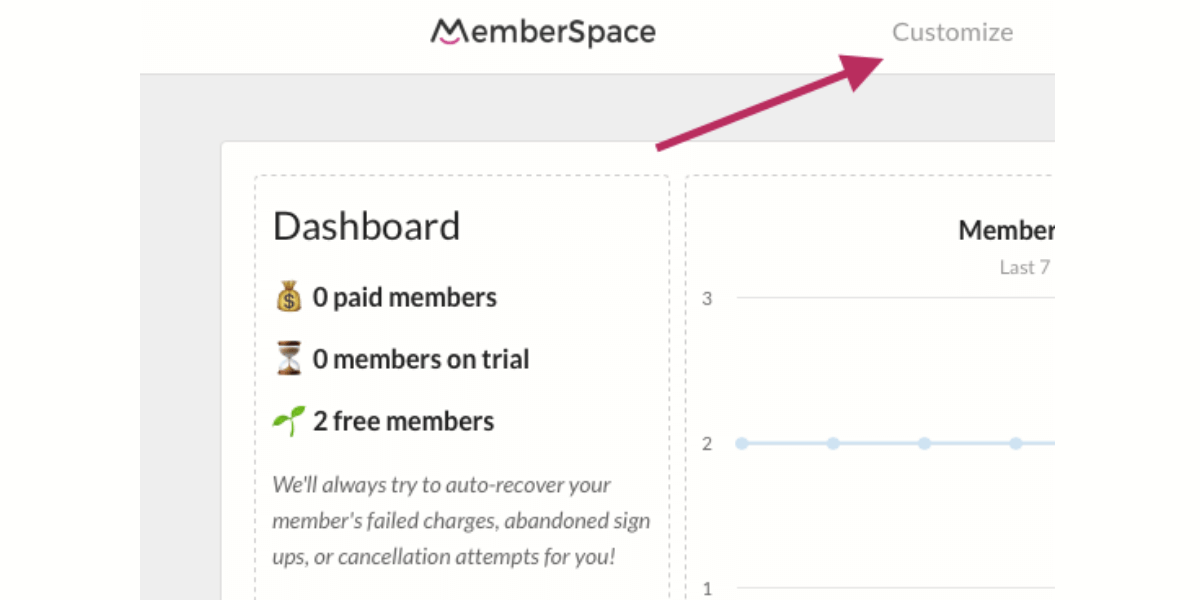
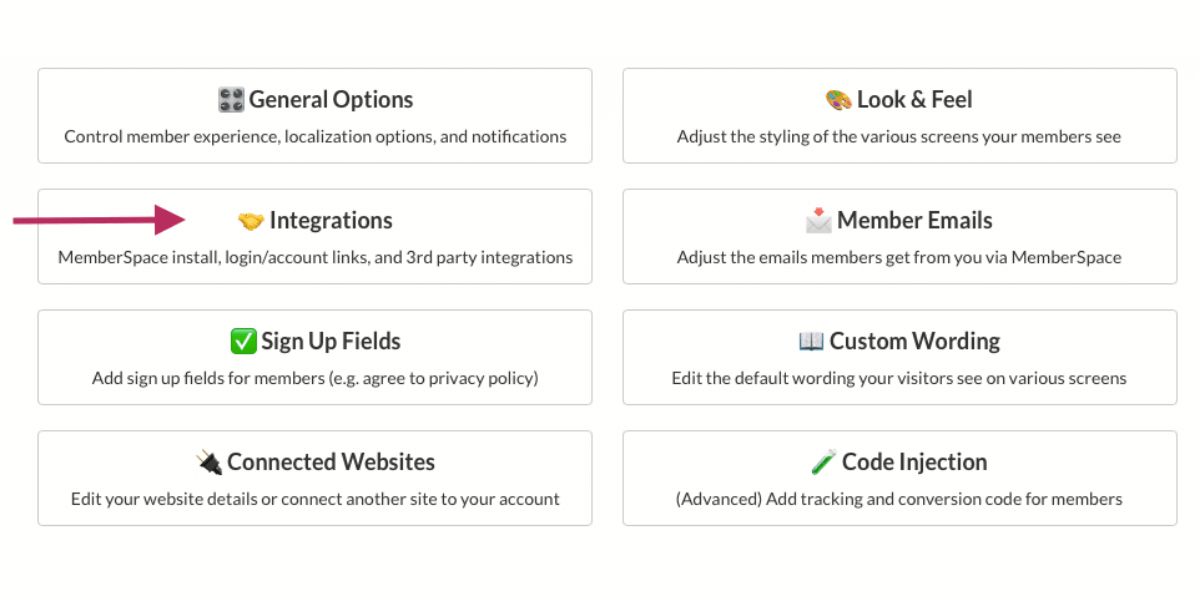
Open another tab and pull up your MemberSpace dashboard. Click “Customize” at the top.
Next, click “Integrations” and then “Carrd.”
Copy everything in the section titled “100% required install code.” Keep the “Display a Login / Account button” box checked.
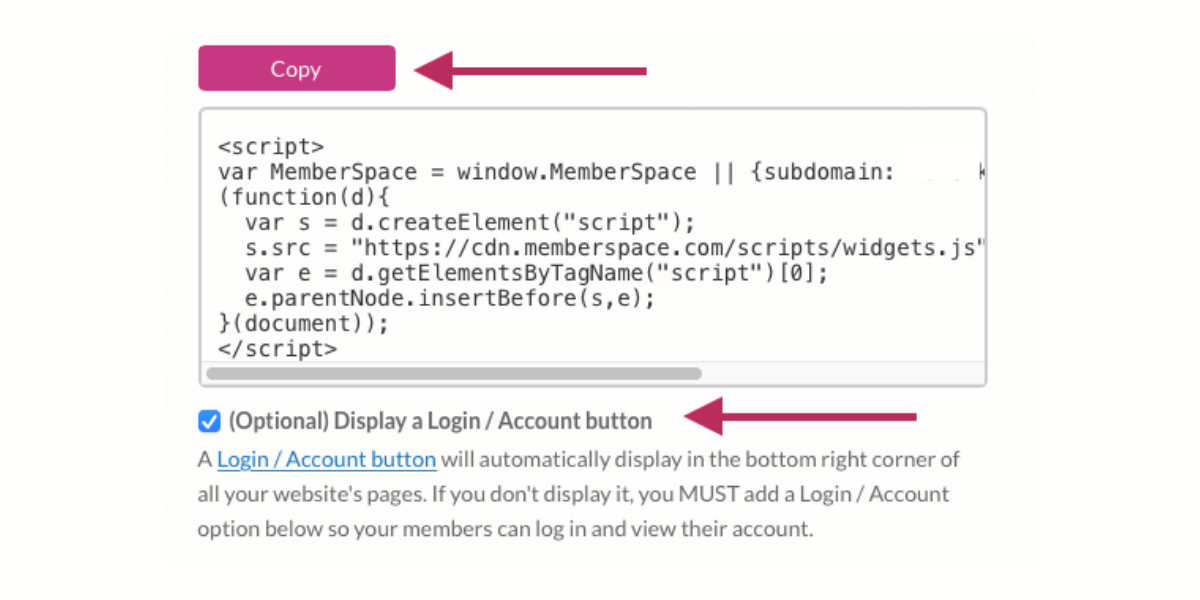
Go back to Carrd and paste everything you just copied into the “code” area of your embed element settings. Click “done” to save.
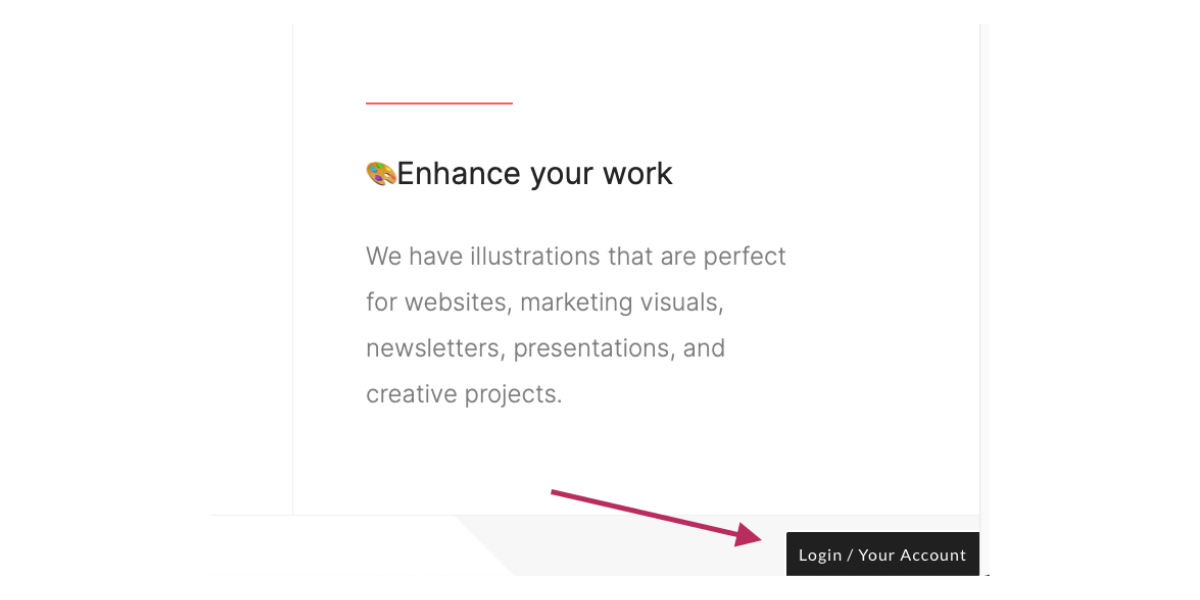
This code adds a login button to the bottom of your site.
Step Five: Add Member Information to Your Carrd Website
Go to the “#dashboard” scroll point on your Carrd site. Click the container that is directly beneath the scroll point to select it.
Click the plus sign in your menu bar and select “</> embed.” Drag this element to the top of the container.
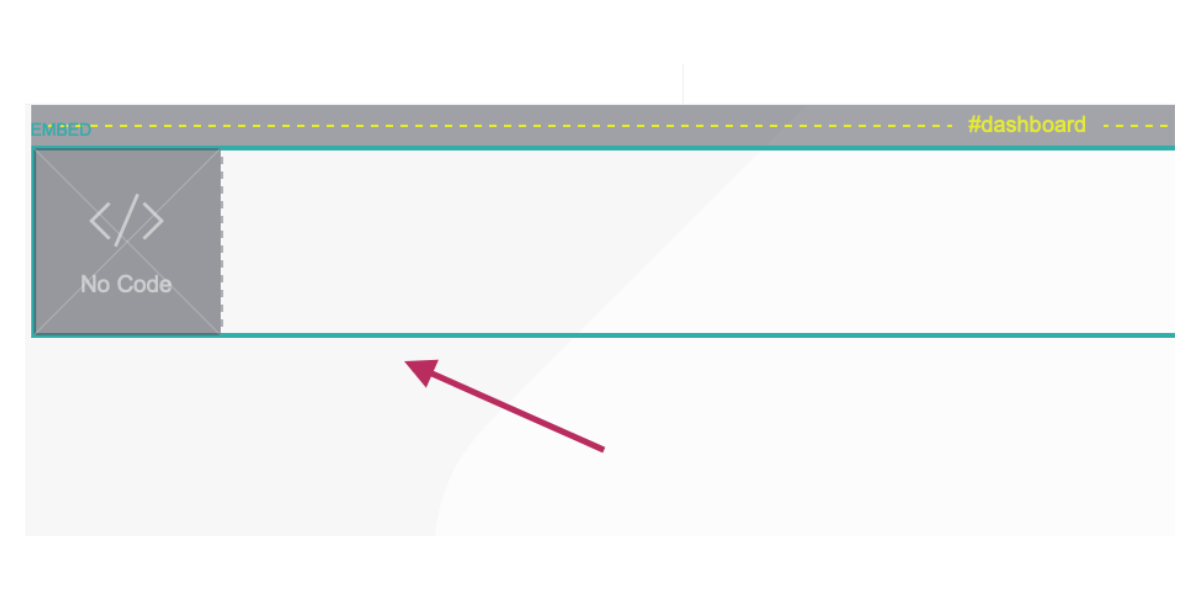
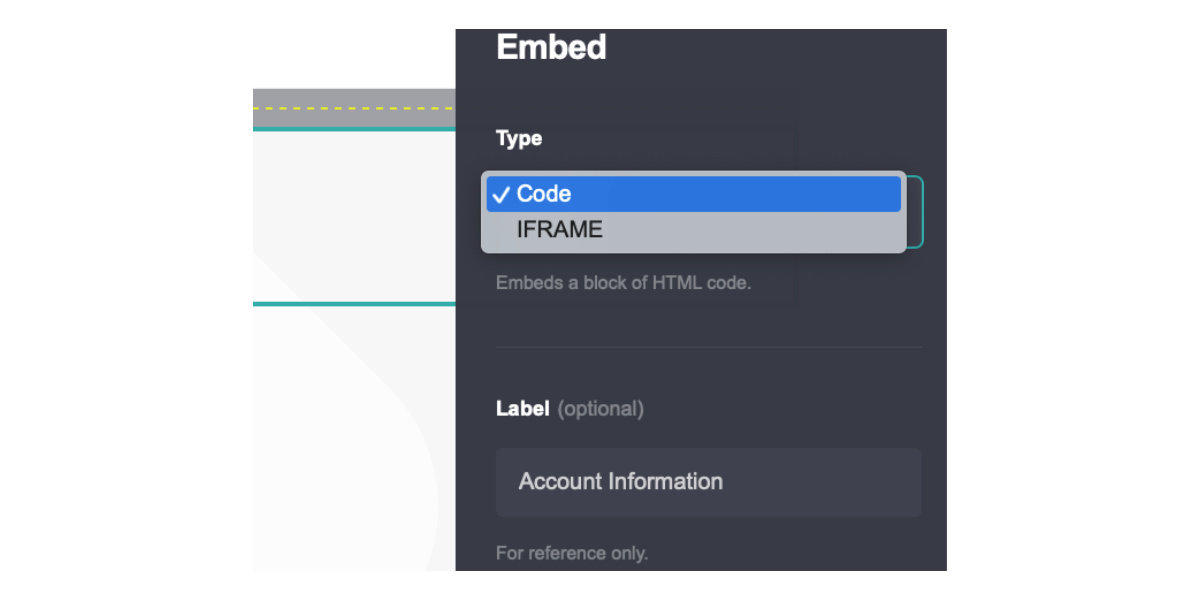
Click on the embed element and title it “Account information.” Set the type to “code.”
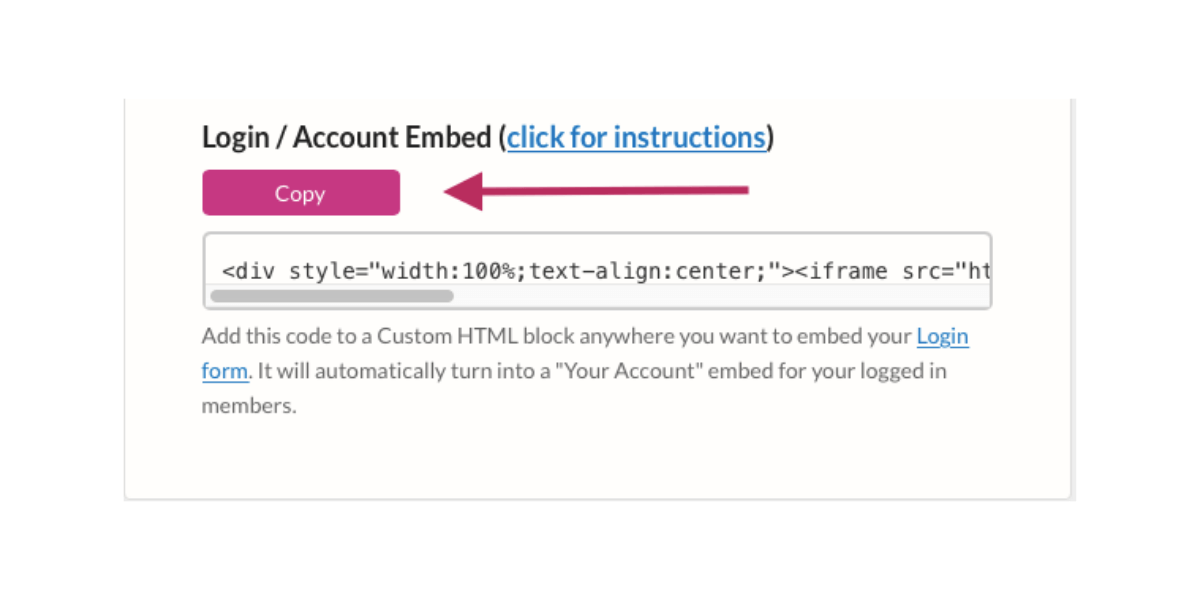
Return to your MemberSpace dashboard in a new tab and click “Customize,” then “Integrations” and Carrd” as in step four. Grab the “Login/Account Embed” code by clicking the pink “copy” button.
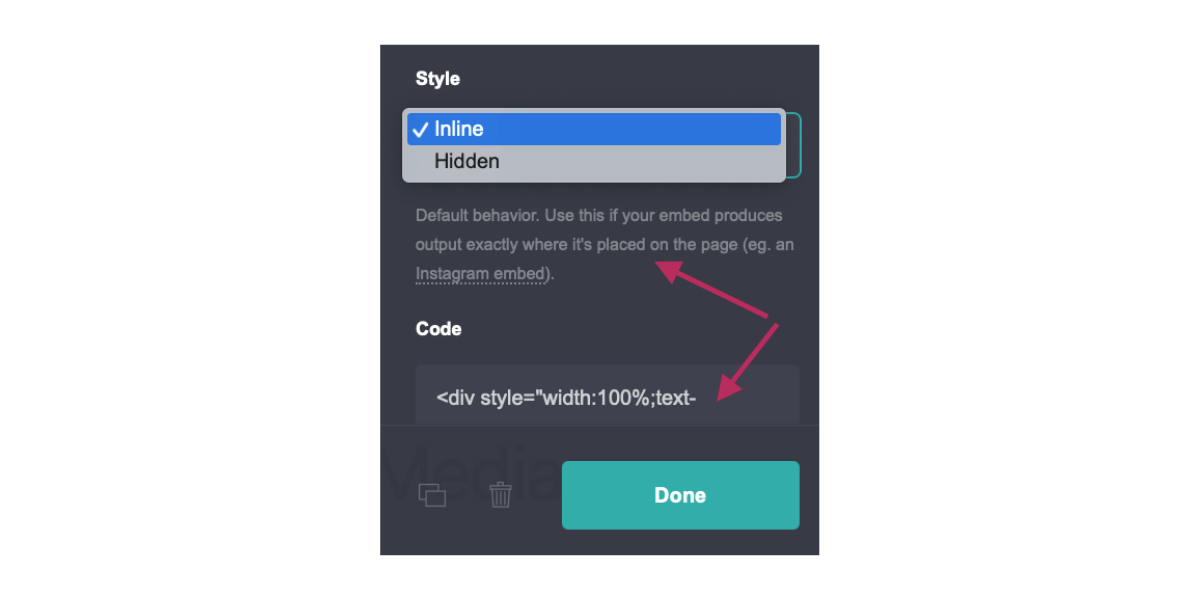
Paste this code into the new embed element’s settings. Set the style to “Inline” and click “done” to save.
When a customer is logged into their account on your site, they will be able to access all of their account information and preferences in this section.
Step Six: Protect Your Downloads with Content Links
There are two main ways you can link your downloadable files to Carrd: Store your files in a cloud service like Google Drive or Dropbox. Turn on sharing and copy the provided link, then add it as the download button URL on your Carrd site. Upload your files to MemberSpace and use our Content Links feature to add a double layer of protection. Content Links ensure that only paying members get access to downloads.
You can use the Content Links feature to protect PDFs, images, mp3s, embedded HTML, videos, and other downloadable files.
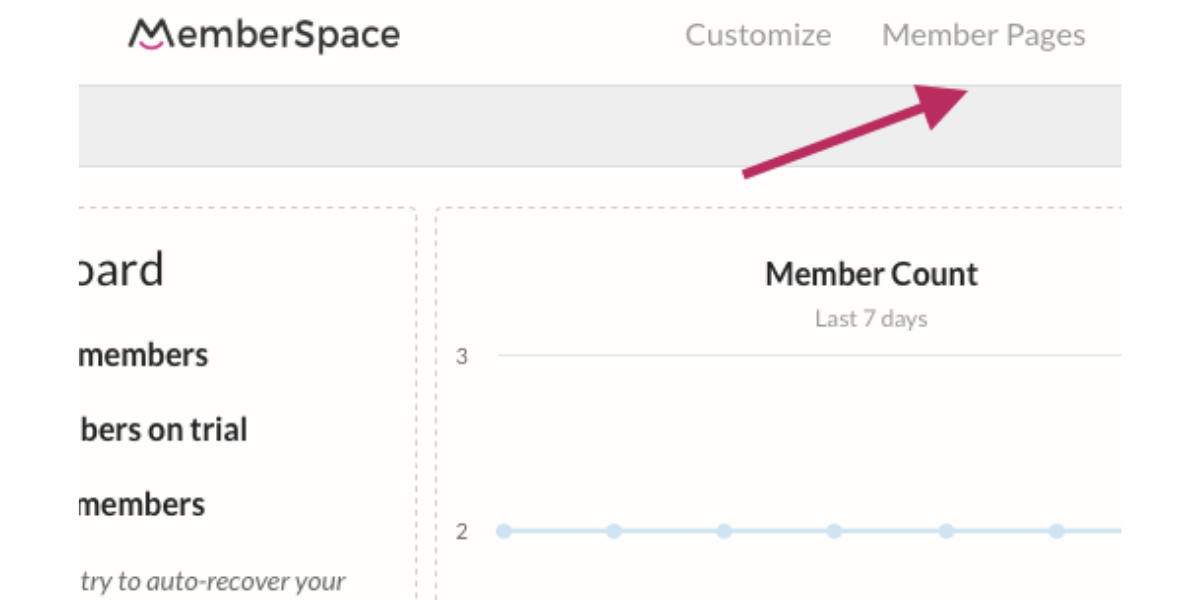
To get started, click “Member Pages” at the top of your dashboard.
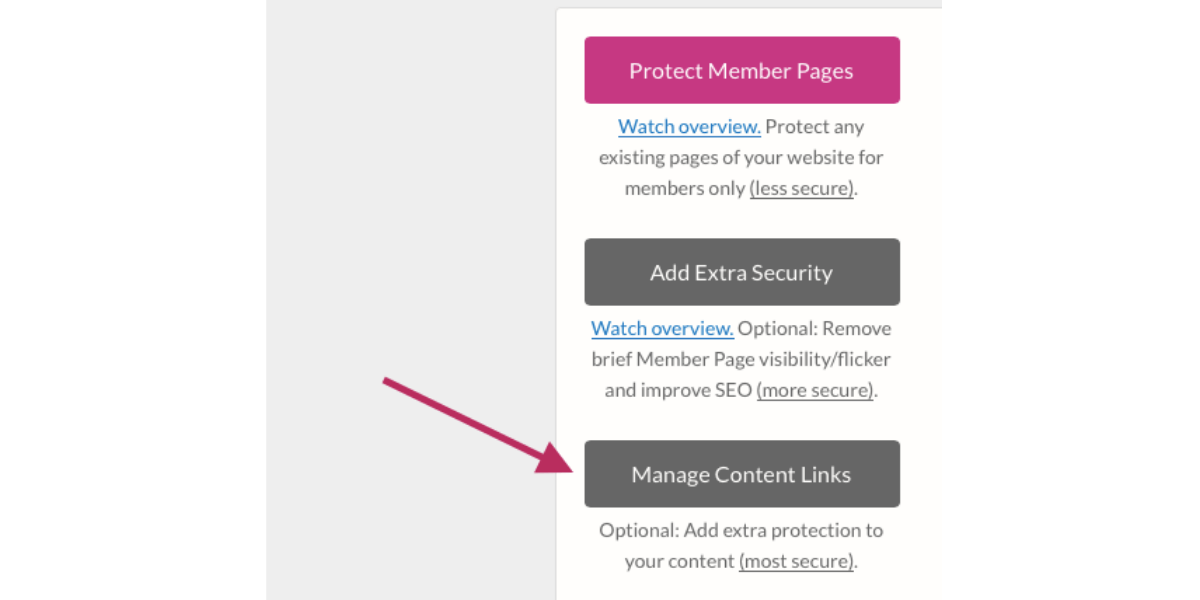
Click “Manage Content Links” along the left-hand side.
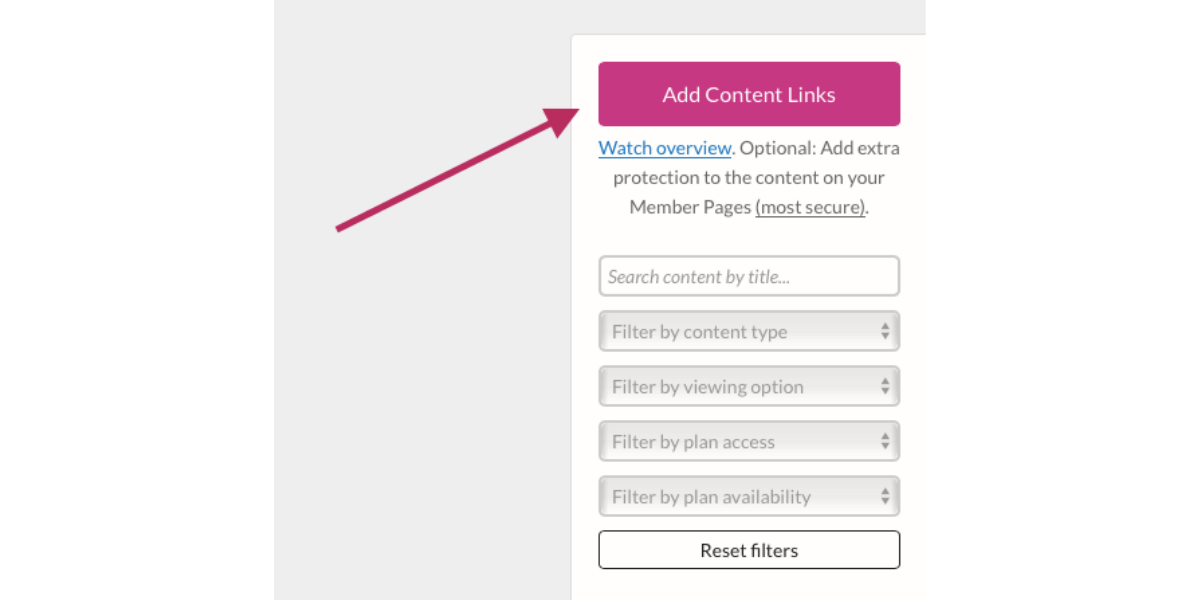
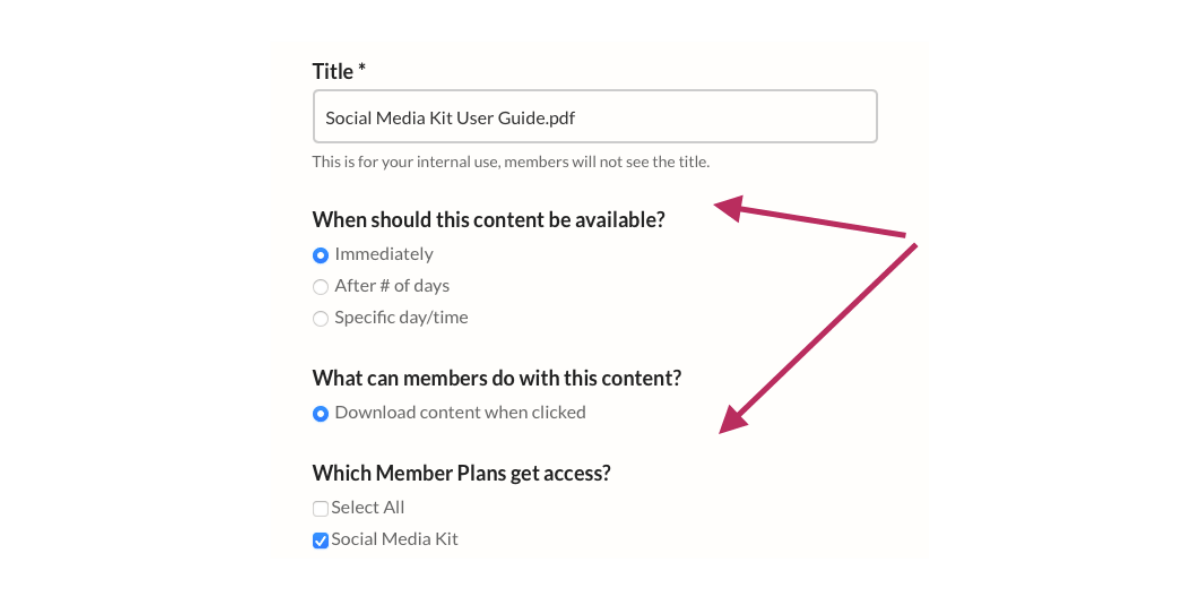
Click “Add Content Links.”
Upload your files.
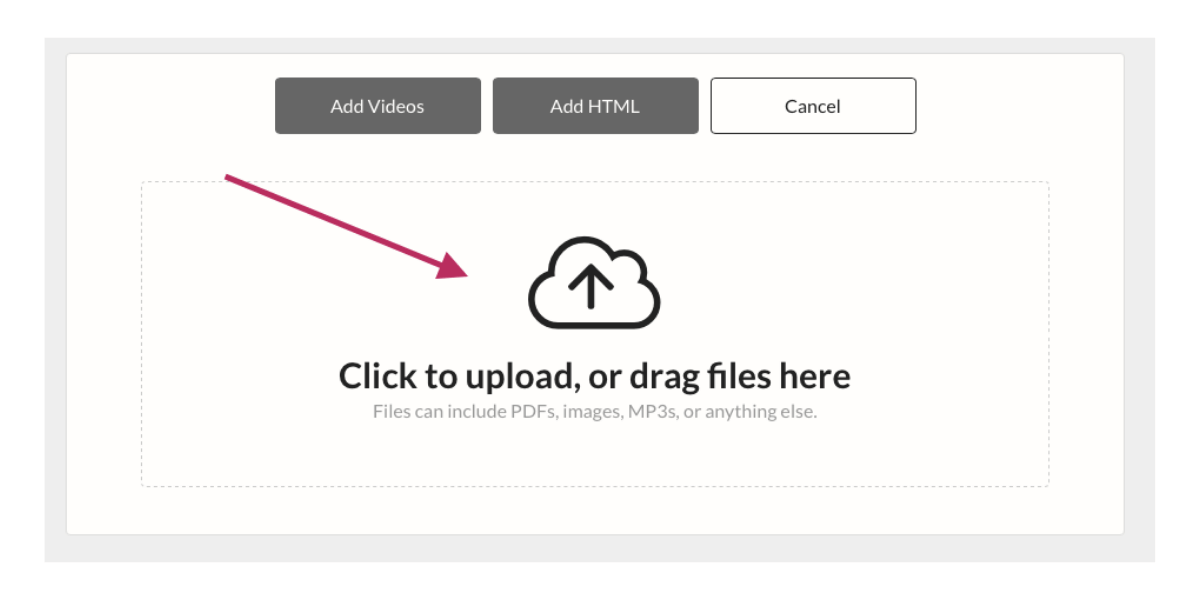
Give your content link a title and select the name of the plan that is allowed to access it.
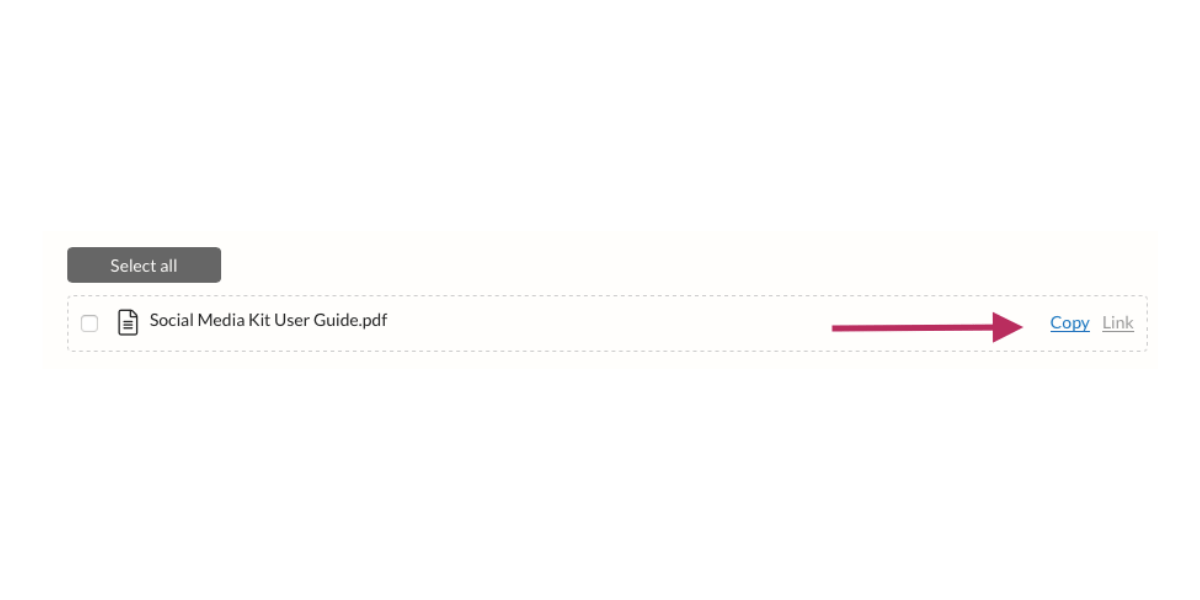
Save and repeat for any additional files. Once you’re done, go back to the main content links management area and click to copy the link next to a file name.
Step Seven: Add Content Links to Your Carrd Website
Return to your Carrd site’s dashboard area. Add one or more buttons that tell members where to click and download their purchased content.
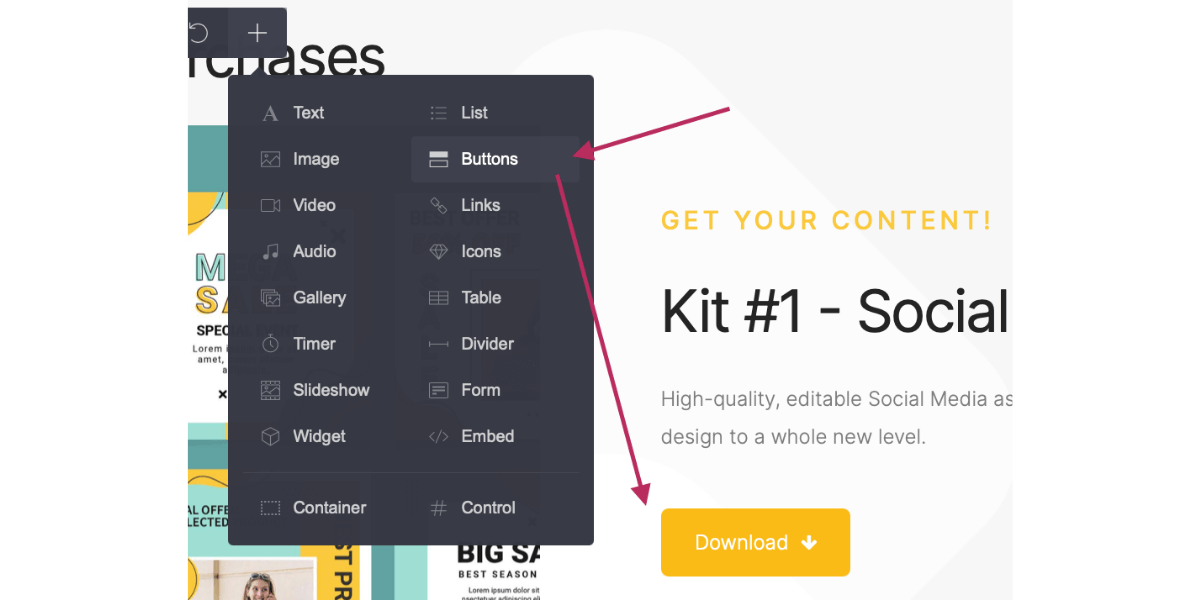
Click on your new button to open up its settings panel. Paste the Content Links URL you copied in step six.

Repeat as needed for every download you will offer.
Step Eight: Hide Parts of Your Carrd Website
Next, we need to hide some site elements from visitors. This is so that members won’t see signup information, and visitors won’t see paywalled content.
Hide members-only content
Click on the dashboard container (not the scroll point) that holds your customer-only content. Next, click the gear icon in the settings menu that opens up.

Under the attributes label, click “add attribute.”
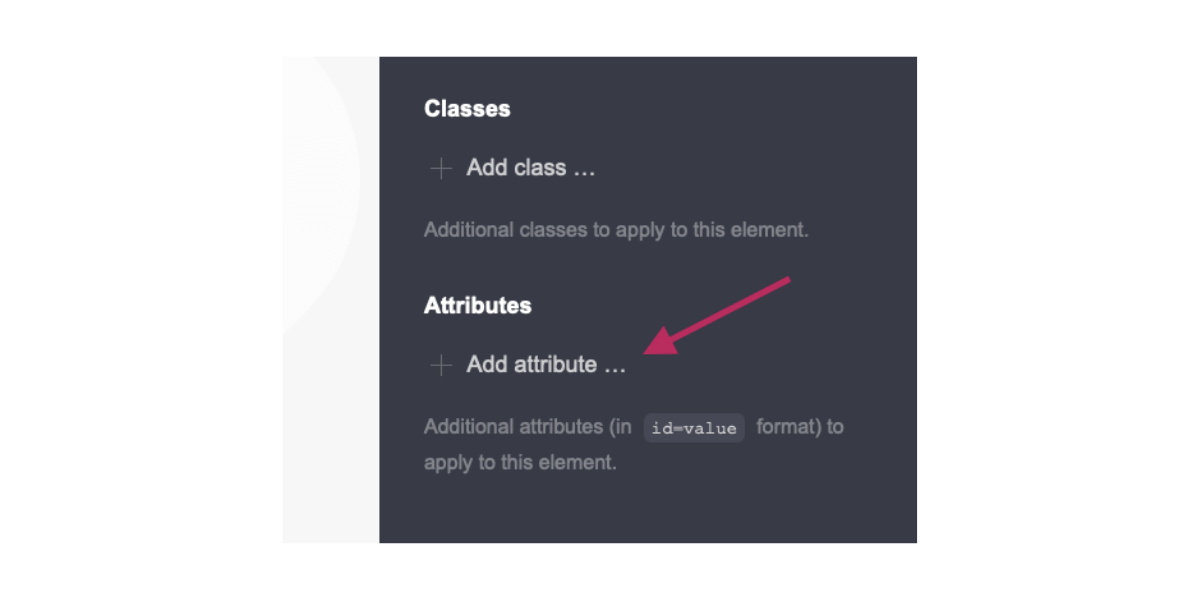
Paste the following text:
data-ms-show="paid"
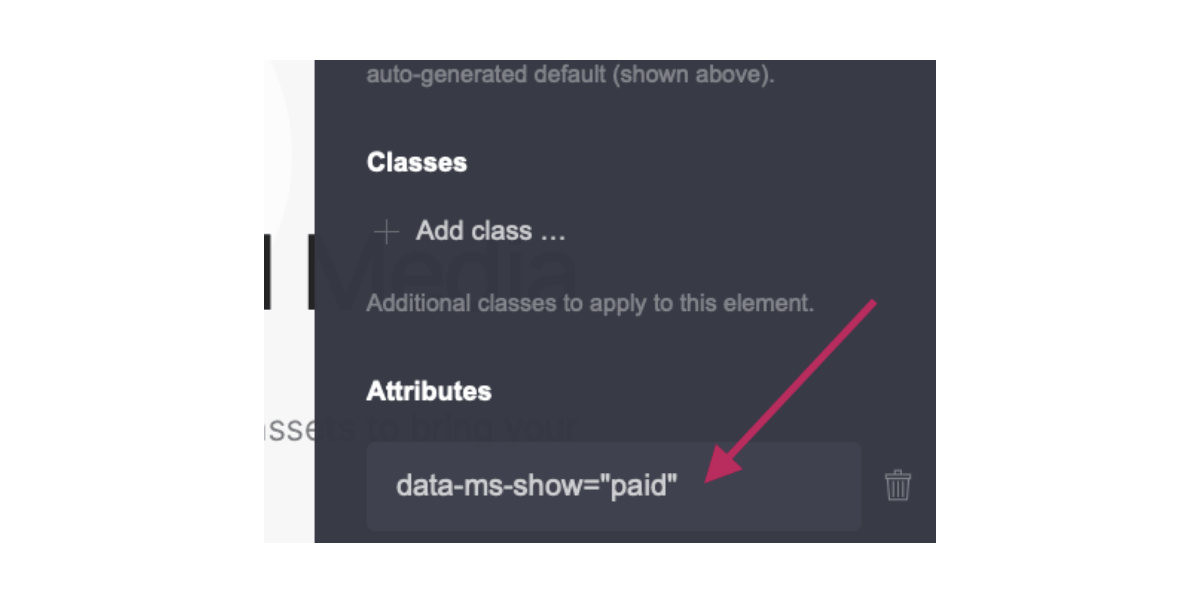
Save and click on the “account information” embedded code block. Repeat the steps above to add the same attribute.
Hide plan-specific content
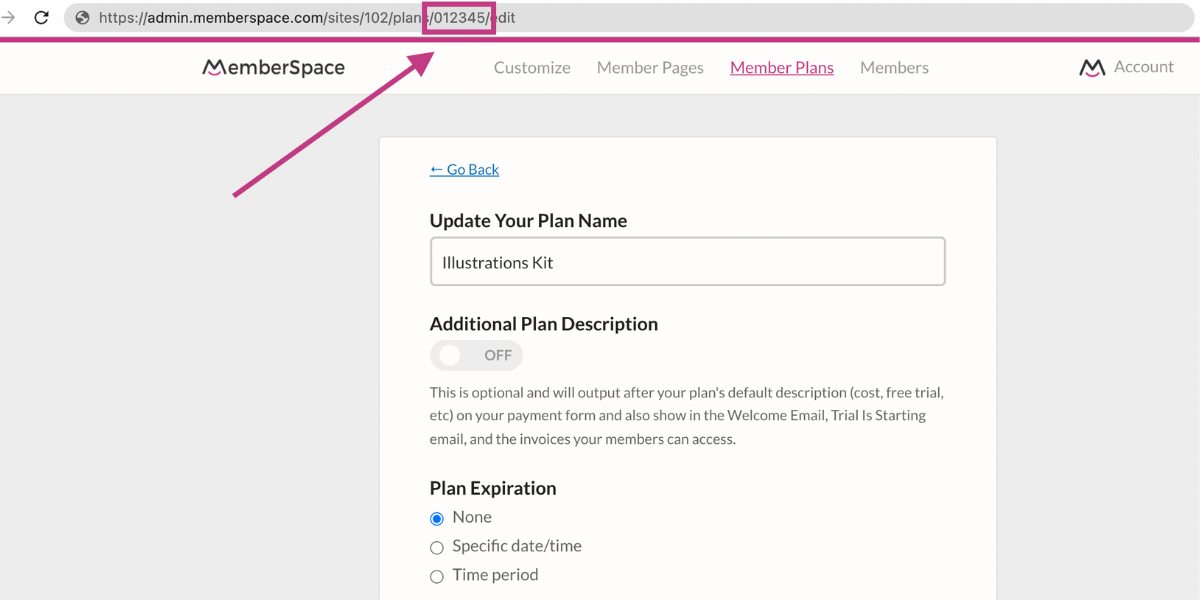
Open your MemberSpace dashboard in a new tab and click on “Member Plans” at the top.
Click the member plan you created in step two. Click “get sign-up link” next to the plan name.
Copy only the string of numbers and letters at the end of the URL. This is the plan ID.
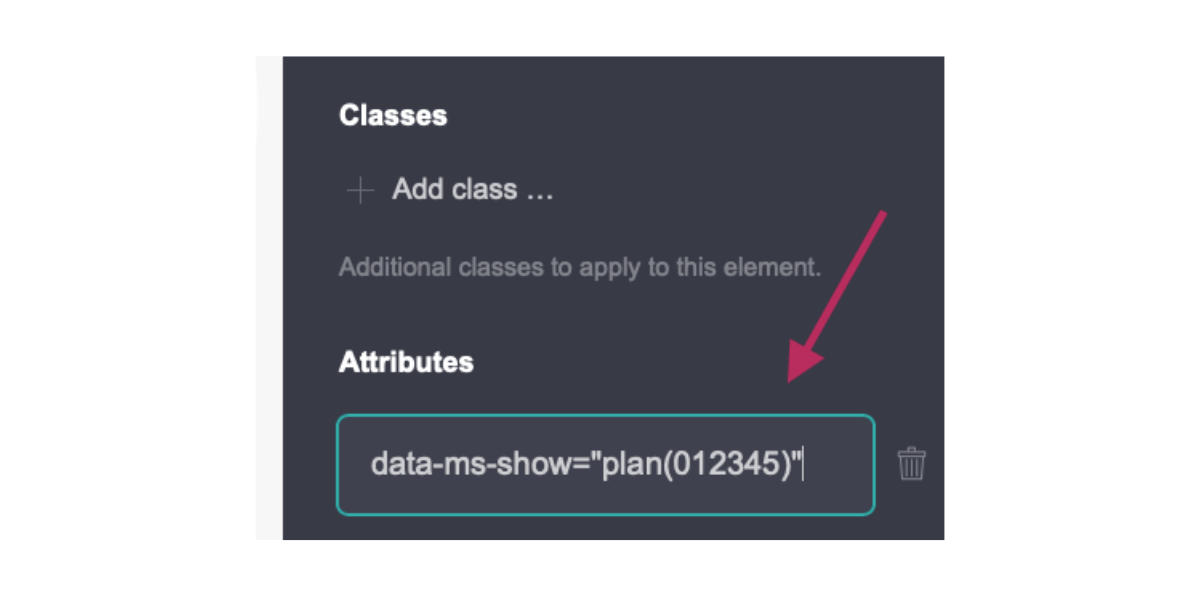
Go back to Carrd and click on the download button you added in step seven. Then click on the gear icon in the settings menu that opens up.
Add a new attribute and type the following text, replacing the # symbol with the plan ID you just copied:
data-ms-show="plan(#)"
This attribute restricts the button to logged-in users who have purchased access to this specific download.
Repeat with any additional content download buttons that should only be visible to members on certain plans.
Hide plan signup from members
Once a member is logged into your Carrd website they no longer need to see information about joining a plan.
Click on the container that holds information about registering for each plan. Next, click the gear icon in the settings panel that opens up.
Click to add an attribute and paste the following text:
data-ms-hide="auth"
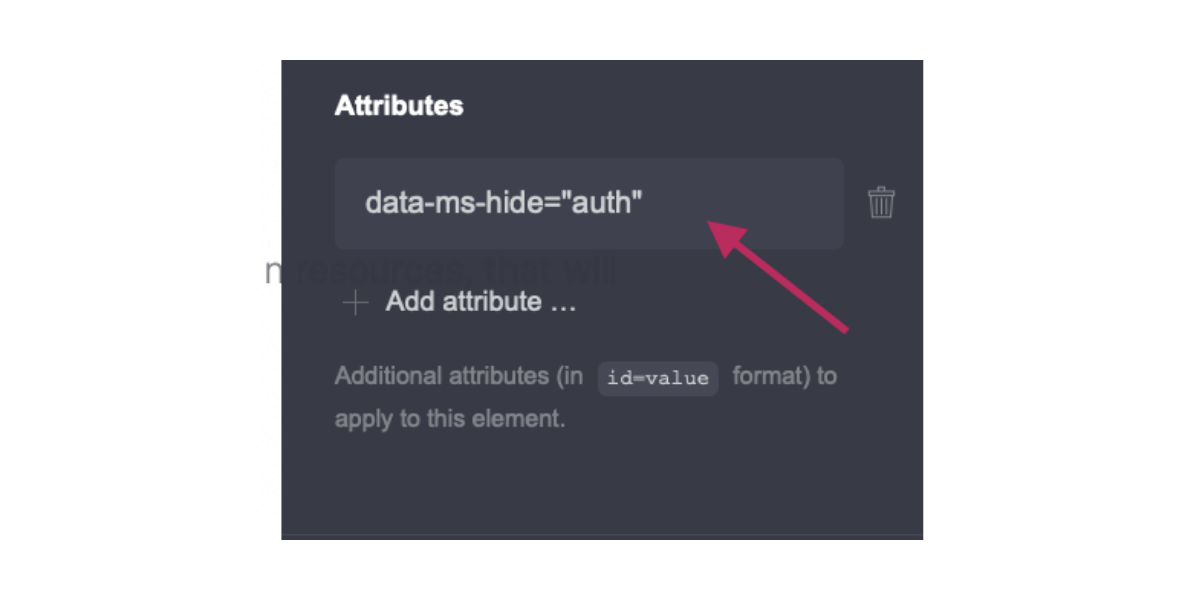
Click save to finish.
This section will now disappear for anyone logged in as a paid member. You can repeat this for any other sections or elements that you want to hide from members.
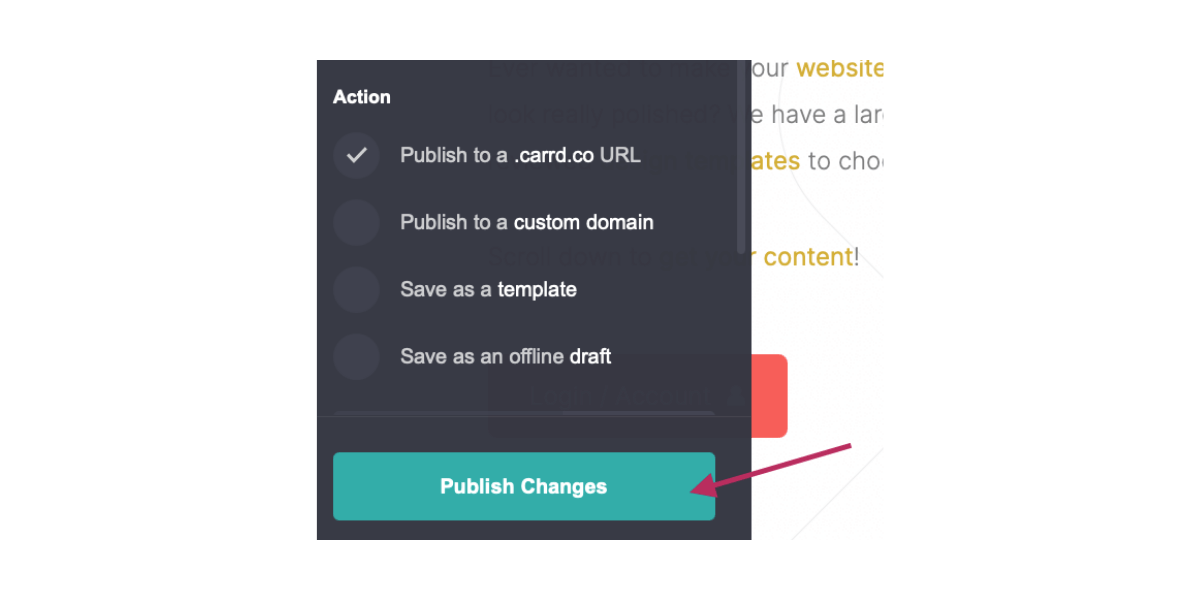
Step Nine: Publish and Test Your Carrd Membership Website
Click the menu icon and select “publish.” Next, click the green “publish changes” button to apply all of your recent updates.
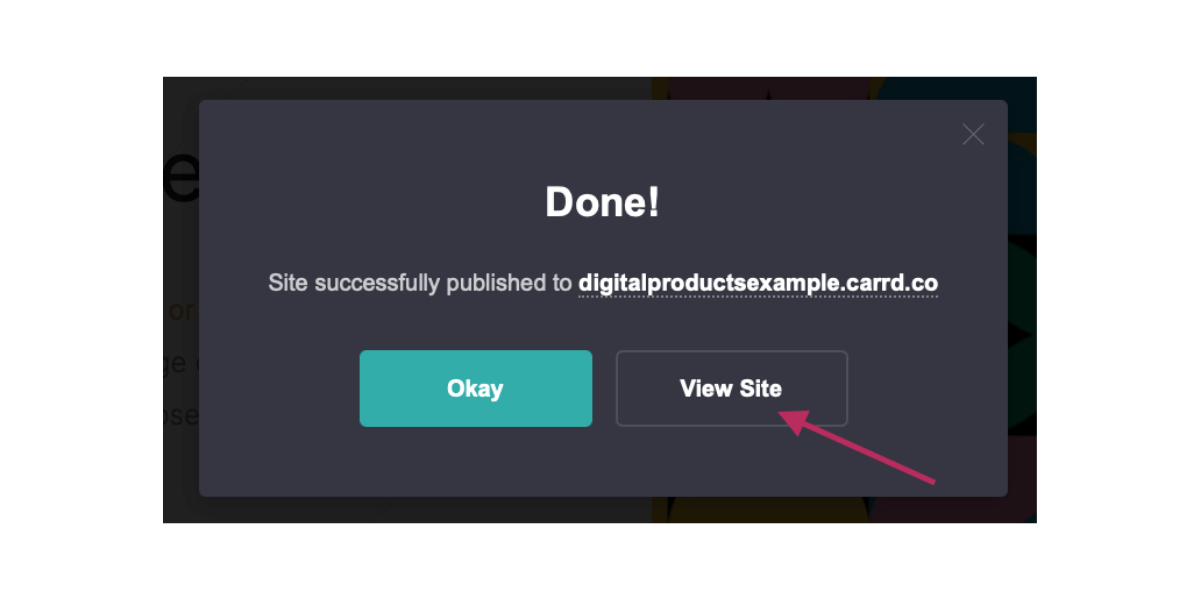
In the box that pops up, click “view website” to check out your live site.
It’s always a good idea to test your new Carrd membership site at launch. Set up a free test plan or 100% off coupon in MemberSpace and “purchase” one of your downloads. Make sure that the appropriate sections of your website are hidden from members and non-members.
Other Ways to Use MemberSpace with Carrd
You can create up to 10 websites on your Carrd Pro plan, and sell memberships on two of them with your existing MemberSpace plan. (Want to sell memberships on all 10 sites? No problem! You can easily add more sites to MemberSpace.) Use Carrd and MemberSpace to expand your membership business and:
- Turn your digital downloads site into a full content library.
- Add a paid community with MemberSpace’s Circle integration.
- Launch a paid newsletter.
- Create a private podcast with MemberSpace’s Castos integration.
Want more inspiration? Browse through our resources, listen to the MemberSpace podcast and dig around in our membership toolbox to see all the ways you can grow your new membership business!